How to Draw Realistic Hands, Draw Hands


1
You can use a No. 2 pencil, but draw very lightly this shape. Make sure you leave room on your paper for the thumb, fingers, and wrist.

2
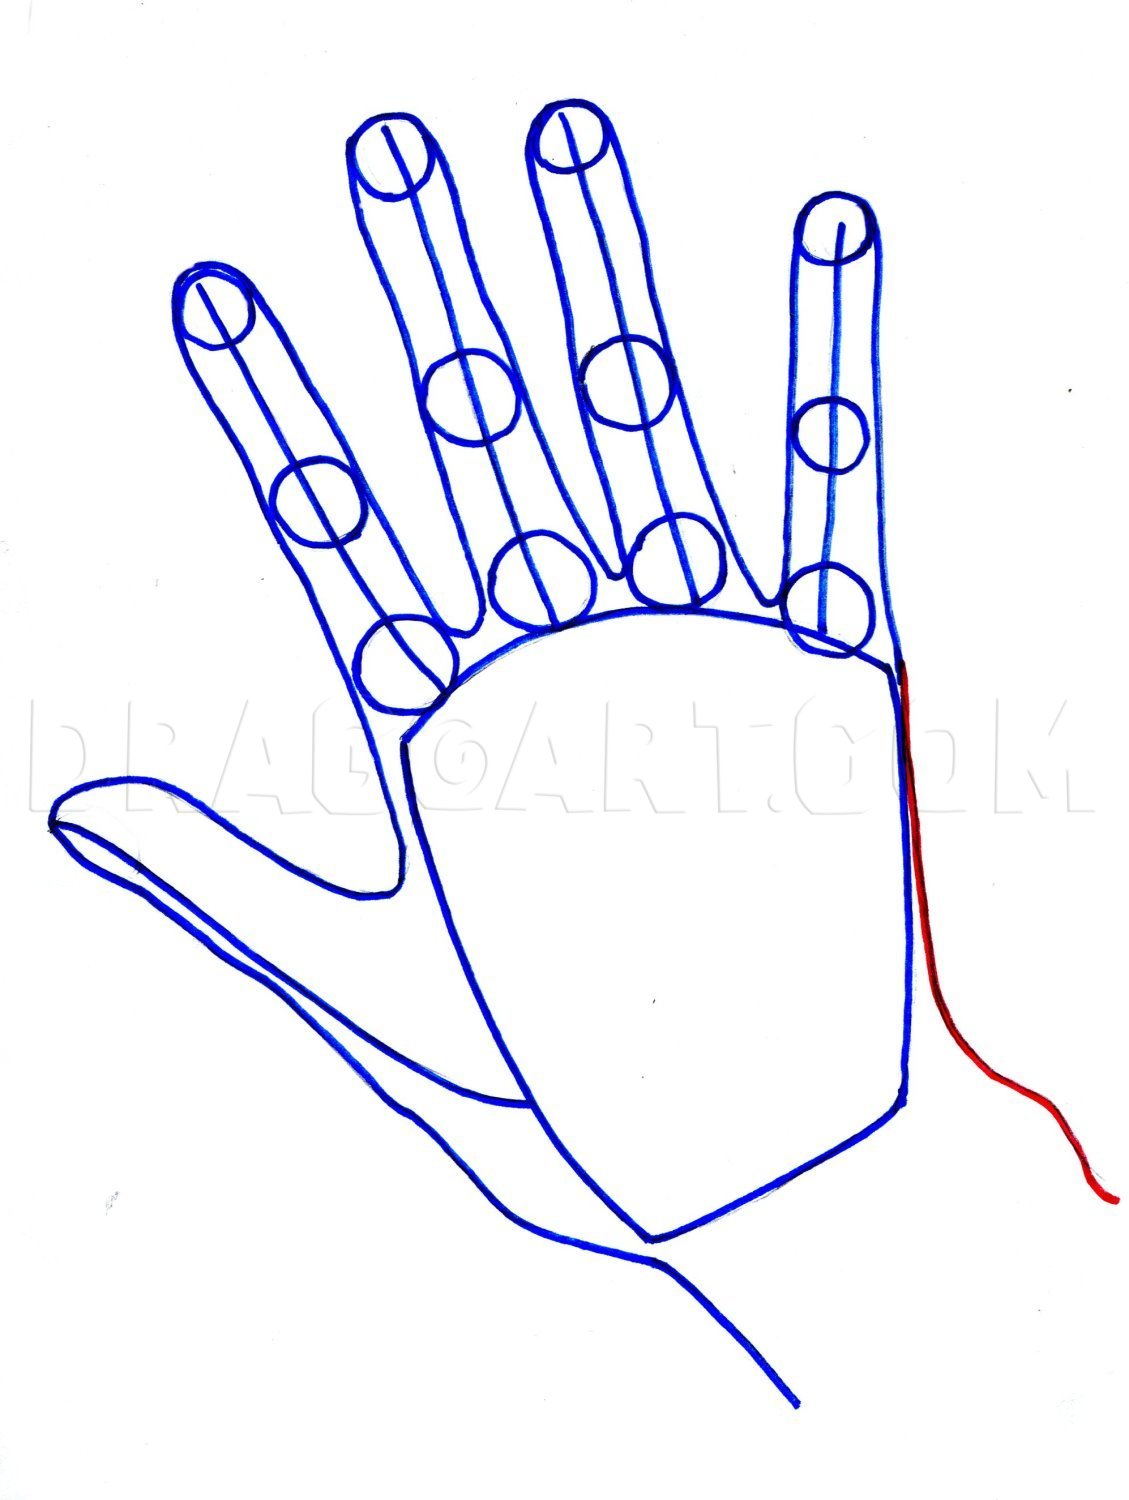
See how the red lines for the fingers radiate from the oblong shape placement for the back of the hand. Those do not line up strait. Notice how the tips of the lines follow the top curved line of the back. Keep this in mind while you are drawing.

3
Now add the small circles to the lines. What is so great about those circles is they help with the finger mass and placement of the joint hinges & knuckles where the fingers bend...remember draw them on a curve (not straight). Complete this step by d

4
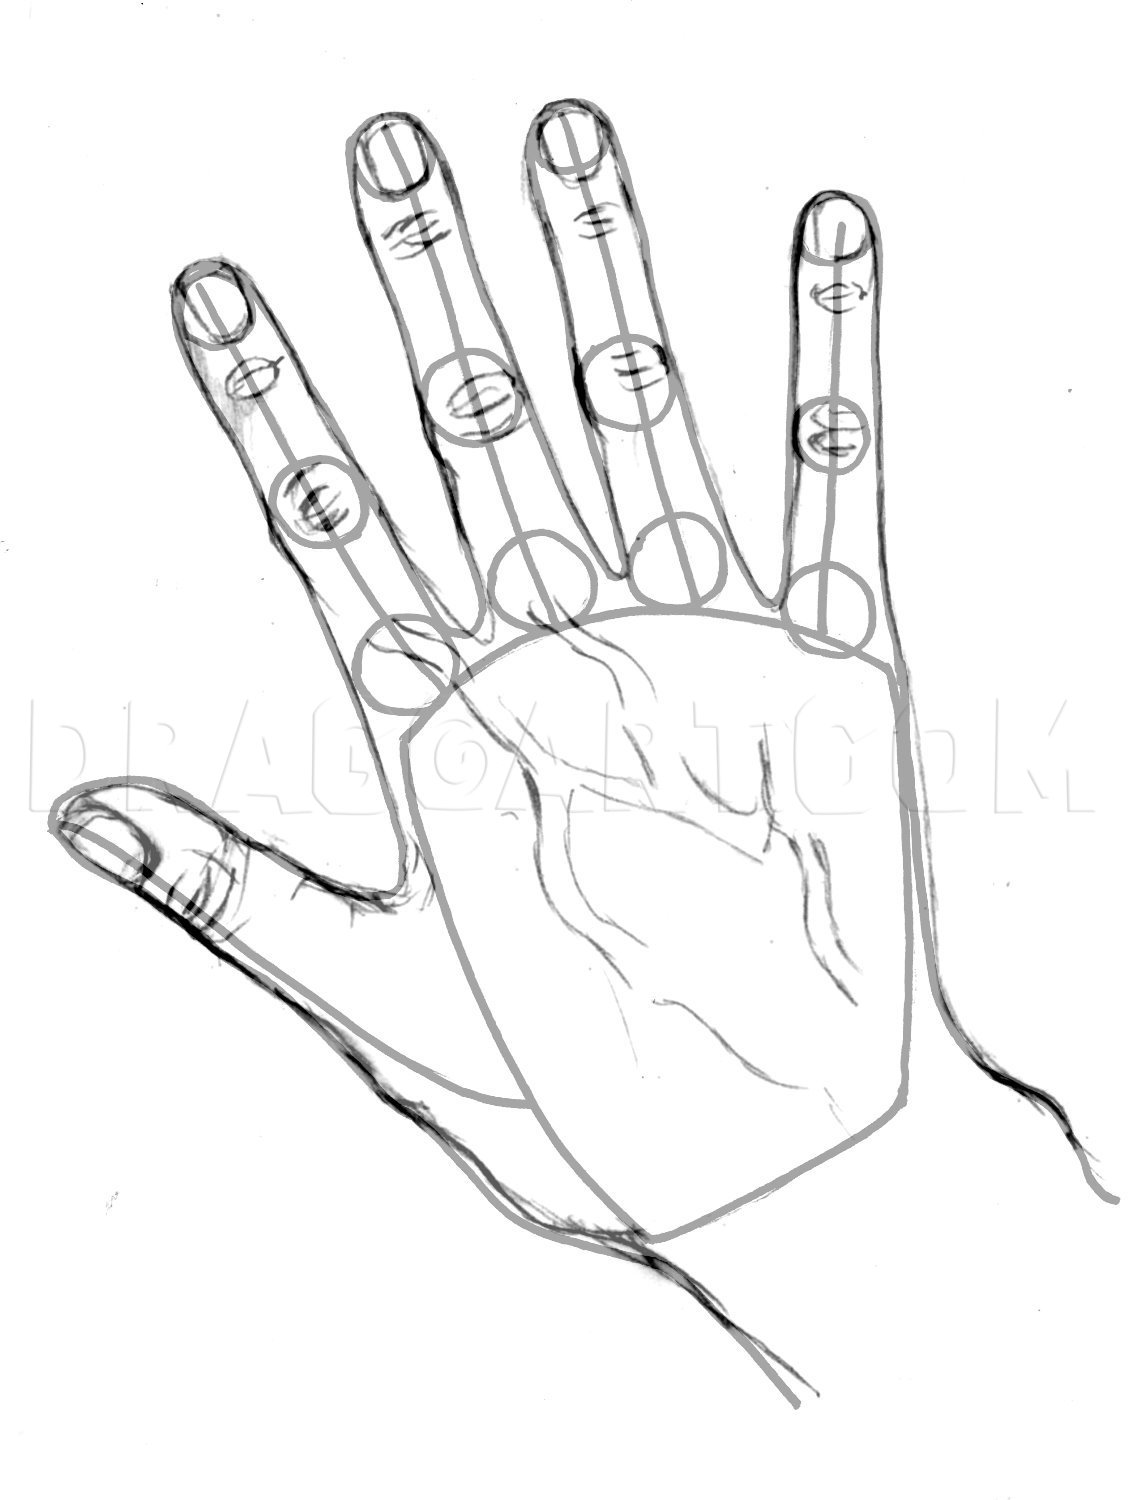
Congratulations! You are making great progress! Simply draw in the fingers and lower portion of the thumb.
5
Make sure you extend the opposite end of the back of the hand. Remember to draw in the wrist (both the blue and red portion with the bone hump).
6
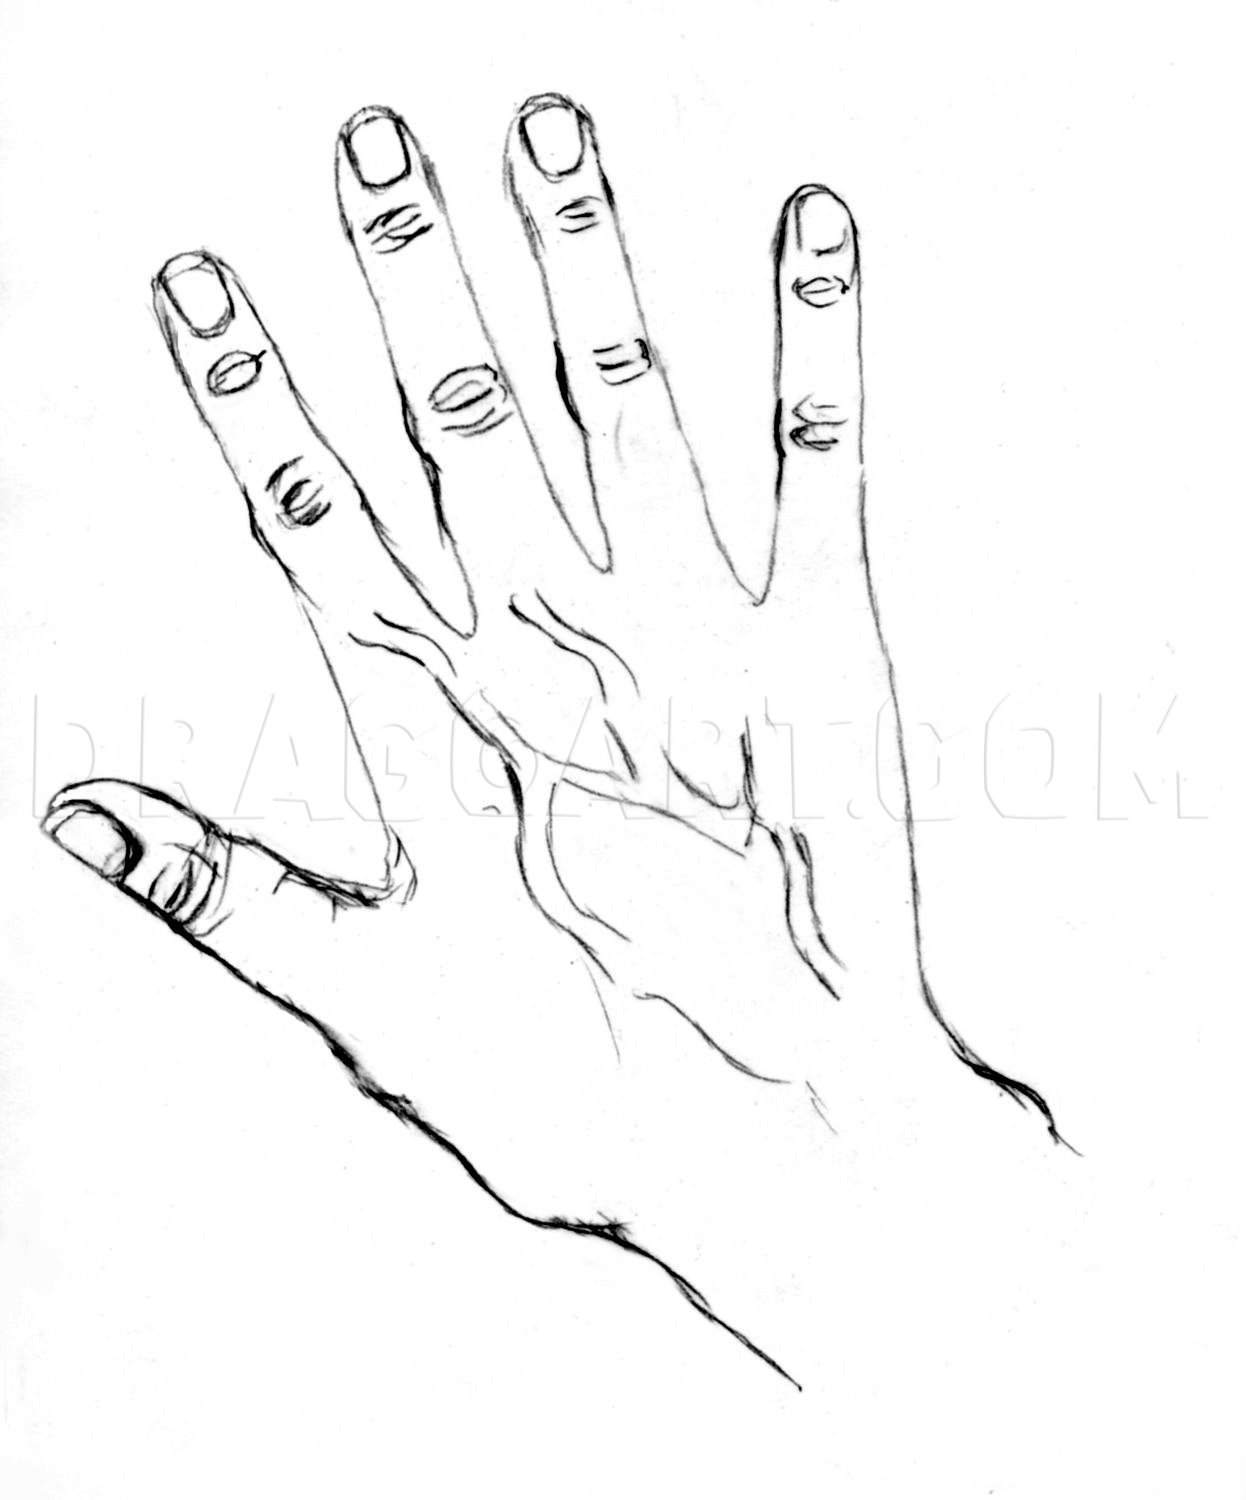
If you want to add nails, wrinkles at the knuckle joints, and veins on the back of the hand.
7
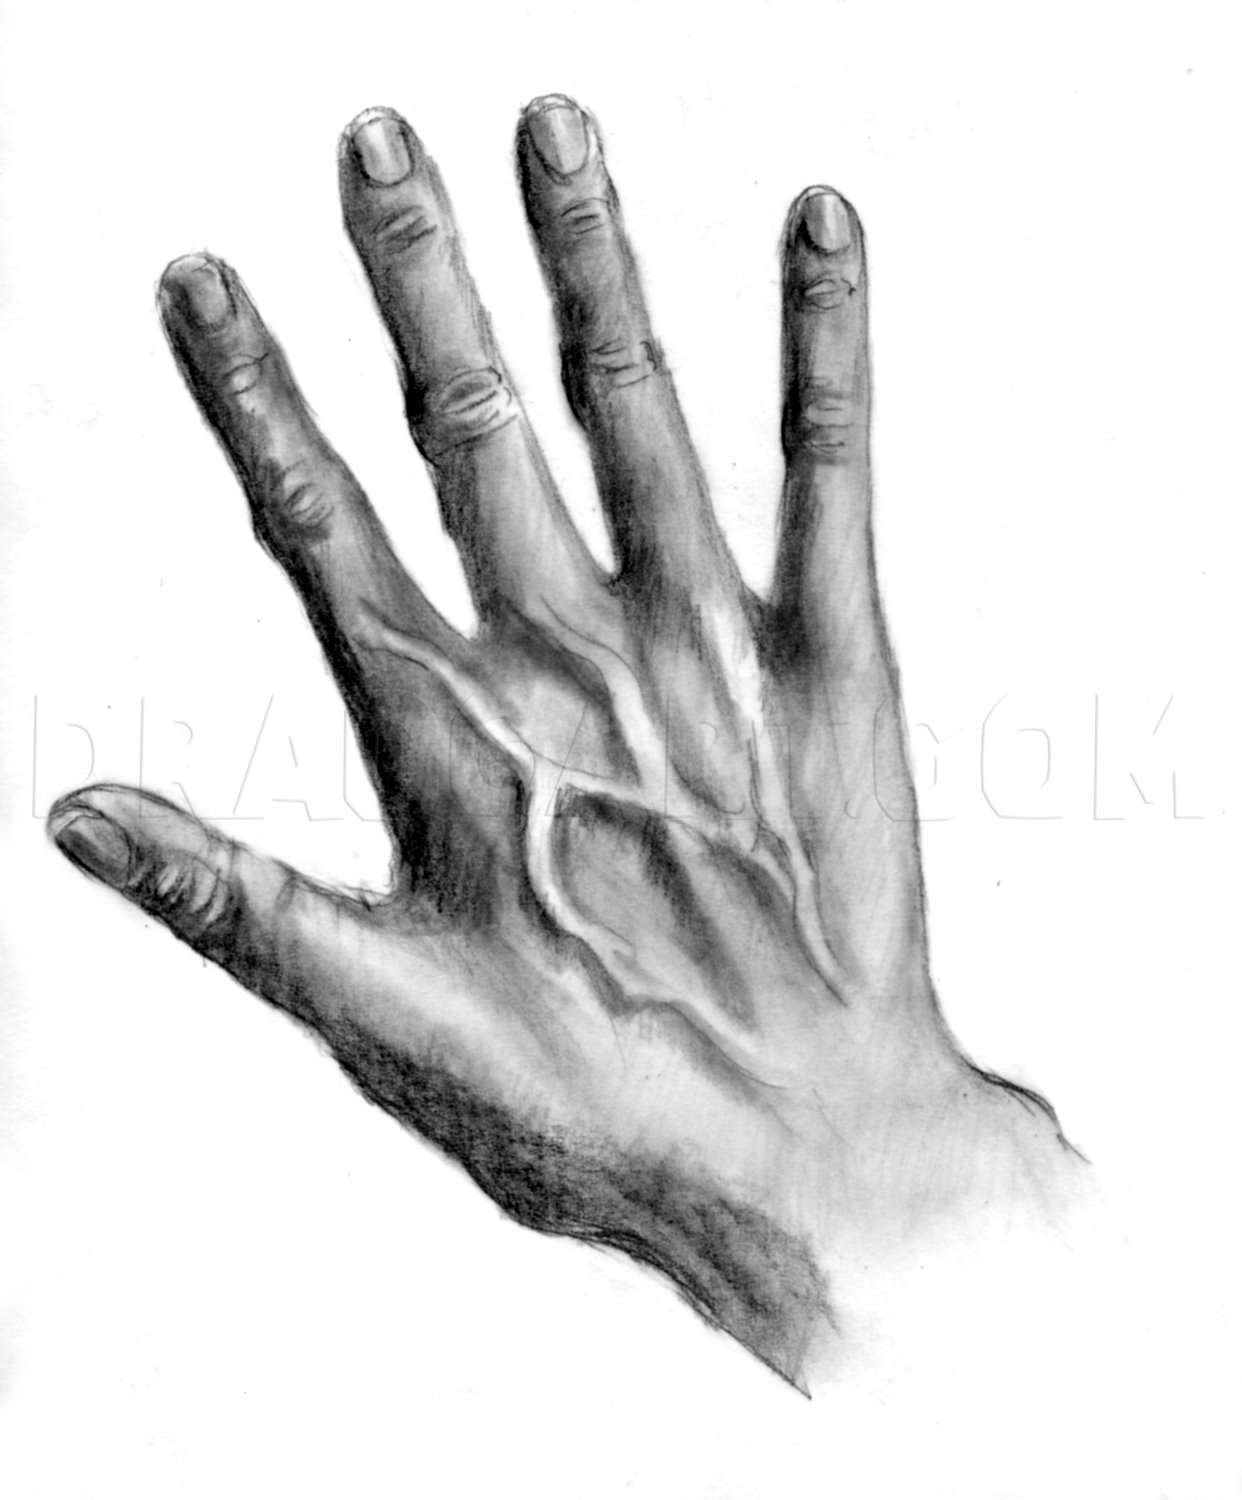
Fantastic! Give a sigh of relief because you have completed an outline or sketch of a realistic hand. Your picture may look like this one. If you will, please take the journey with me and dive in on a lot of tips for "How to Draw Hands." Step 15 star

8
Okay...I don't mean to be facetious, but there were times when I was younger I used to get mixed up with the names of fingers. So for those who know and those who struggle in knowing, this is for your convenience to have at the tip of your fingers.

9
What is up with all this knowledge? What good is it? Well, if you have a basic knowledge of what the hand is made of, you'd draw it better. You don't need to know these by heart. It's just good to know they are there. Hey! You might recognize Carpals

10
Here we see how the bones interact with the hand. It's like taking an x-ray!

11
The hand is mostly made up of tendons and bones. However, the fingers and thumb move and flex through the control of the major muscles. Here is a view of how they look and their names.

12
And we have a wonderful view of how the muscles interact with the hand.
13
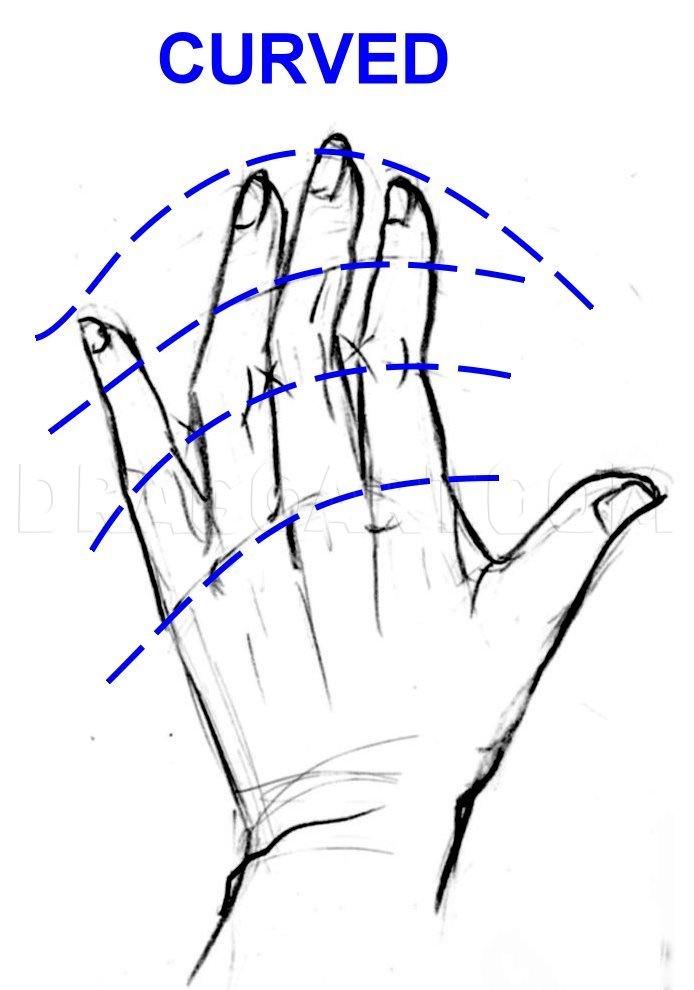
Curves and more curves...that is how you draw the hand. It's good to start out with some light, free guidelines that are curved. The fingernails are curved (not boxy) and the knuckles even follow a curve. This is another hand you could draw and pract

14
Observe the grasping hands I drew. You may see sketch marks and some curved lines...very few straight ones. But those helped me to place my picture and start on it with more accuracy. I first lightly drew the hands. The result was a nice sketchy mess

15
Take your outline and stroke in your lines. You can use the crosshatch, straight lines, or small tiny circles. Remember to start dark on the outer left sides of the thumb and fingers then proceed out lightly. The veins have the shadow on the left sid
16
Now if you want some stroking, penciling, shading, tone, and highlight instructions, open up another tab or window to go to this "How to Draw Faces in Pencil." link: http://www.dragoart.com/tuts/8396/1/1/how-to-draw-faces-in-pencil,-draw-faces-with-p

17
Here is the final product. I'm hoping you have fun with this tutorial, learning, drawing, practicing some more. What I had done was make the hand, veins more equal tone...didn't use a lot of white or highlights in this drawing. I felt it would distra

18
Using this technique of drawing the hand into planes helps you to see where the light hits and the subtle changes from shaded area to highlighted area.

19
This is a wonderful exercise to draw the ball and block method helping to give the hand mass, believability, and accuracy. Notice my curved lines have guided me through these drawings. When you practice drawing all types of poses like these of action

20
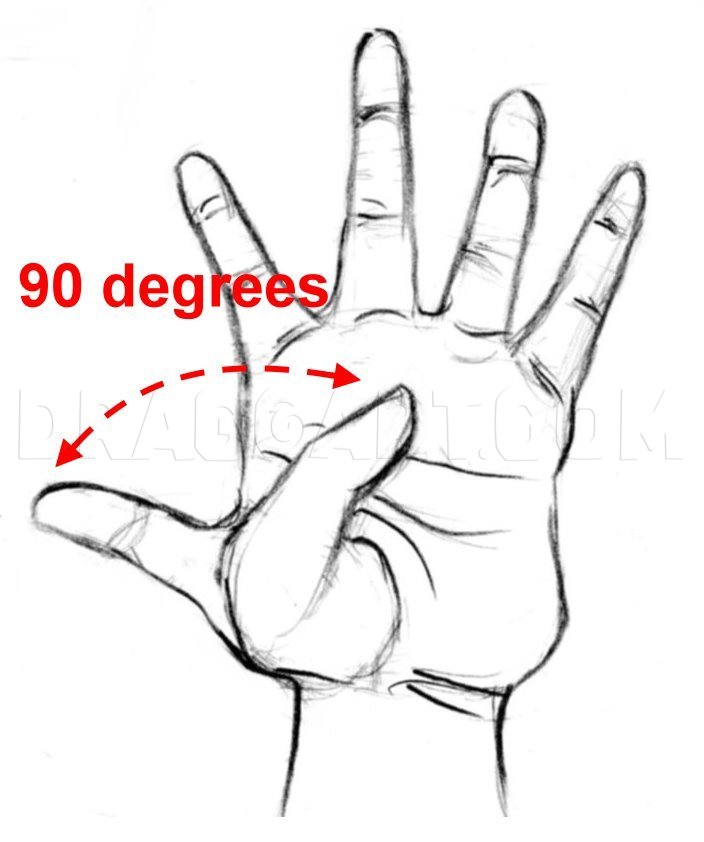
The fingers can stretch to a 45-degree angle. The middle finger can toggle between the index and ring finger without affecting the total distance. Isn't great to know the distance between your fully outstretched thumb and pinky is a 90-degree angle.
21
The thumb can flex from its outstretched position to the pinky (little finger) which is 90-degrees.

22
Here's a diagram on the hand and it's bending points. Click on the picture. I thought it was interesting where the ball joints appear. Oh, I drew this hand...you already know that. But did you know its my hand I drew? There is my hand with the ball j

23
THIS SURPRISED ME! Take your index finger (also called pointer or forefinger) from the tip to the ball joints. Your thumb, length of palm, and width of palm should match your index finger with its ball joint. AMAZING! Check this out. Take your hand,
24
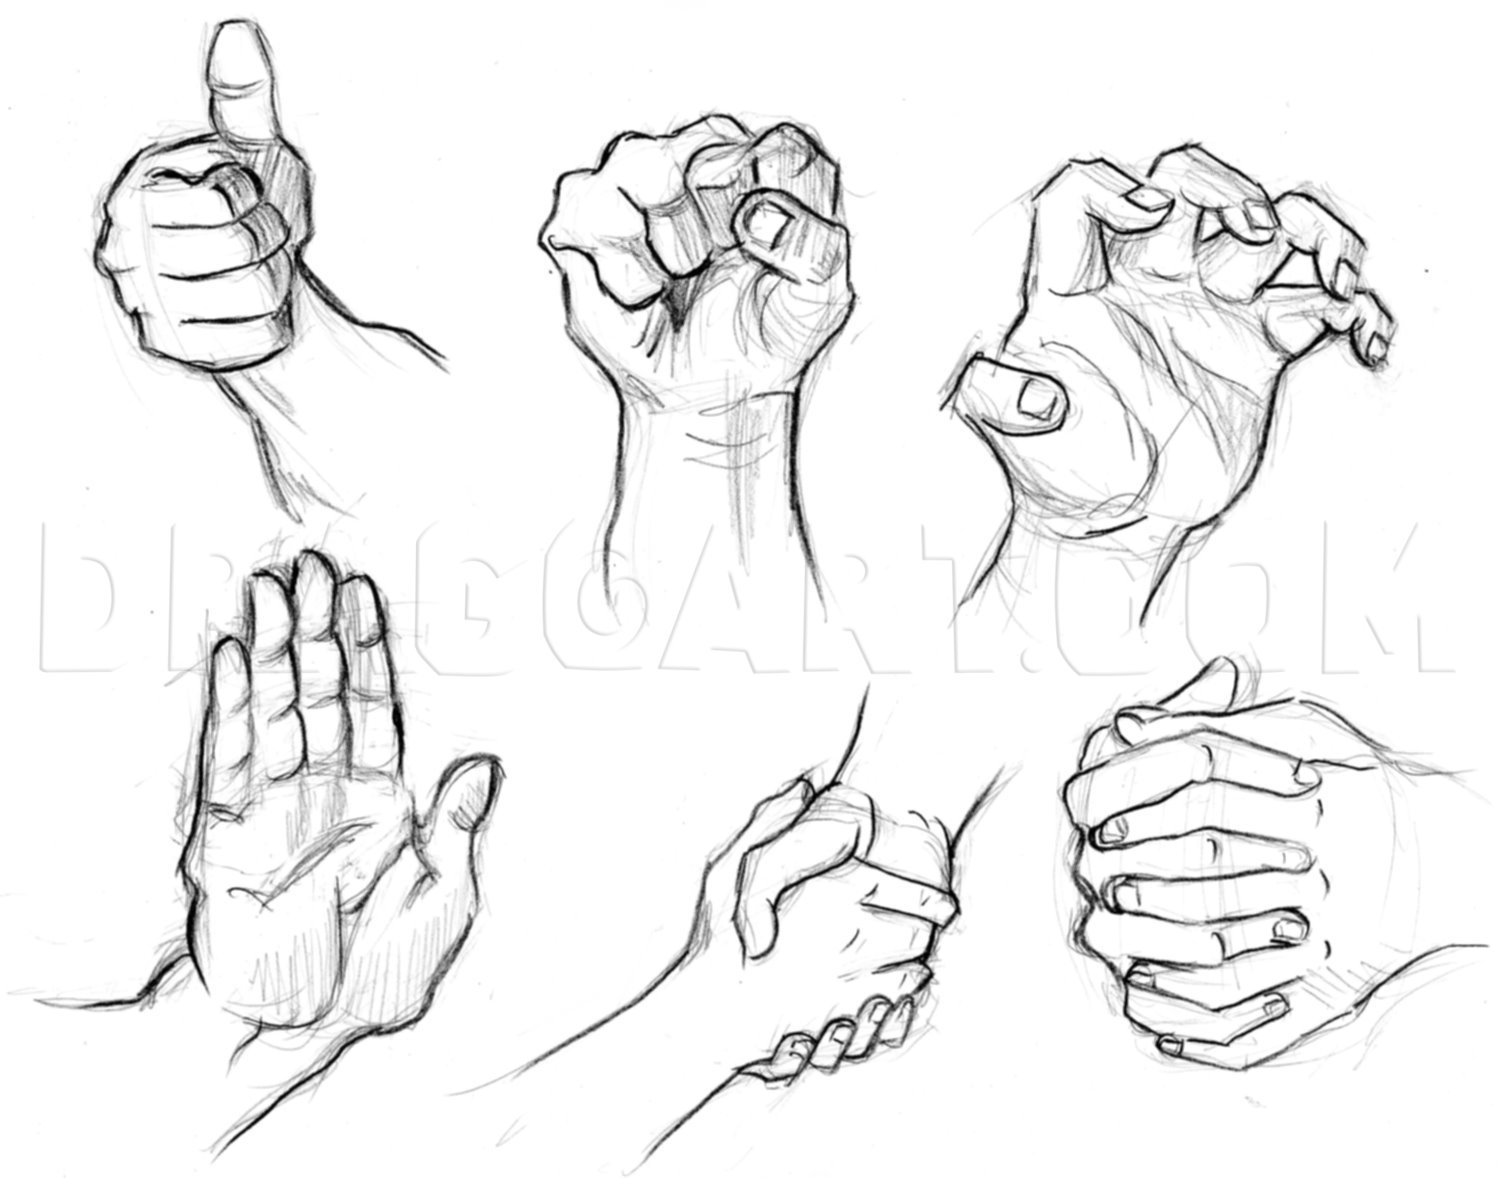
Here are some popular poses you can practice on. Number One or Okay. Power! Grrr! High-Five or Stop! Let's Shake! Thinking or Praying! See if these gestures mean anything else to you. Let me know. And I'd also like to know if this tutorial is helpful
Comments 0
Details
August 9, 2011
Description: Did you know that the fingers and thumb equal same amount of parts of the body. Five fingers equal the head, two arms and two legs. Is it sane to reason the hand is just as difficult to draw as the body? Absolutely! This tutorial is for you, me, and anyone else that wants to learn, "How to Draw Hands." I've always had difficulty remembering how to draw them and settled to do a sloppy job or leave out hands entirely. Those days are over because I have a wealth of tips for you. Stay with me through the steps. Fav, comment, even vote if you wish, but one thing is for sure. Drawing hands won't be the same for you as you follow me while we get out our sketch pads and draw hands.