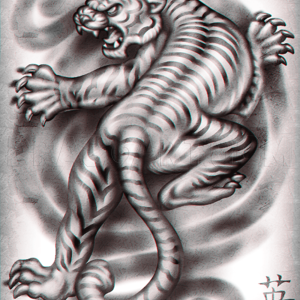
How to Draw a Japanese Tiger Tattoo


1
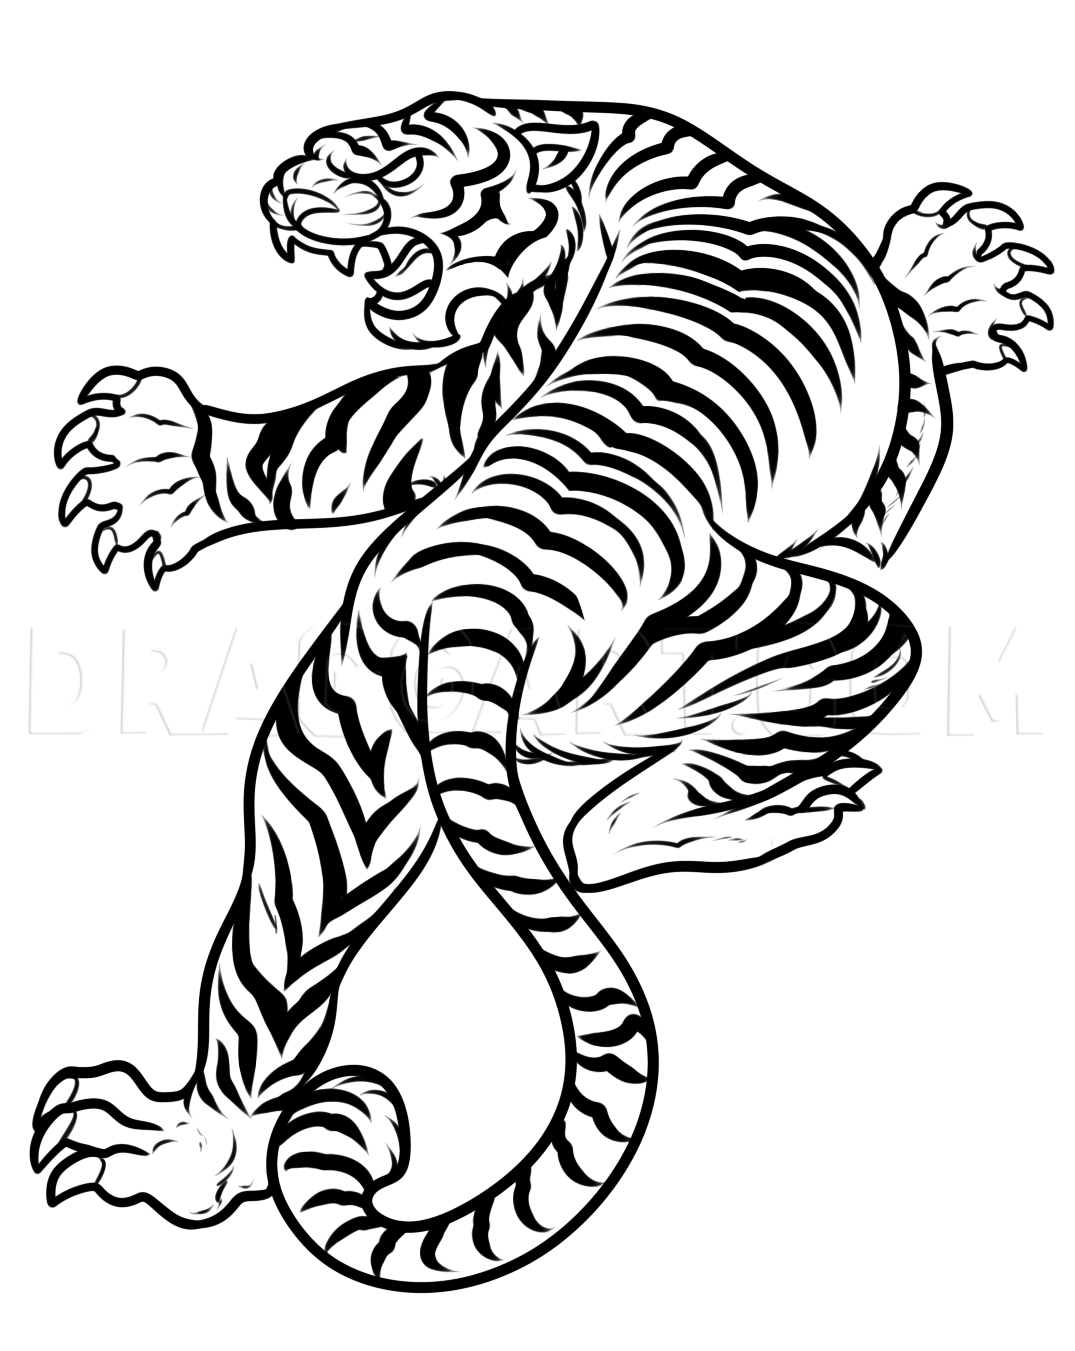
We will begin by drawing quite a few different sized shapes that will all be used for the tiger's body. The head, body and limb guides should also be made.

2
The tiger's face is going to be draw in a semi 3/4's view to side view. Draw the snout, jaw and jaw line. Add the ears and inner ear detailing as well.

3
Next, let's get the face done. Draw the teeth, tongue and the eyes. Add the nose and whiskers too.

4
Draw the neck shape first, then draw the slithering pose of the body shape. The torso pops out on the right and the back and hind leg leg stretch out while the right rear leg crops up.

5
Here we will draw in the front legs and massive paws and claws. Notice there is an extra toe/claw. Sketch in the bone detail on top of the paw as well.

6
We will now draw in the rest of the back legs which also happens to be the back paws and claws. Sketch in the leg muscle detailing along with the long curled end tail.

7
Lastly, erase your mistakes and guidelines and then fill the tiger's body with some stripes. Color them in and you are all set.
8
Add a really nice background and color in your Japanese tiger. I hope you show off your work on Dragoart by submitting your finished drawing and by showing people you know.
Comments 0
Details
June 29, 2015
Description: This is the grand finale drawing tutorial that I was saving for last. It's on something I never did before. Here is how to draw a Japanese tiger tattoo, step by step. One thing about Japanese style tigers is how the paws are exaggerated and the body is over muscled. This drawing took me three hours from start to finish before I started coloring it in. The complexity level to replicate this tiger is pretty intermediate. I tried laying it out the easiest I could so hopefully that helps. Anyways, go ahead and have fun drawing this Japanese tiger tattoo concept and I will meet you all back here tomorrow.