

Amazing job on this Foxy tutorial very detailed and well thought out. Speaking of FNaF I was wondering if you might be able to do a tutorial on Vanessa from FNaF Security Breach? https://freddy-fazbears-pizza.fandom.com/wiki/Vanessa
How to Draw Foxy the Fox, Five Nights at Freddys

1
Foxy has a pretty complex design, compared to Freddy, so we're going to build the full figure with as much detail as possible in the guide line stage. Then we'll take care of the details in the inking stage. To begin, draw a large hexagonal shape for

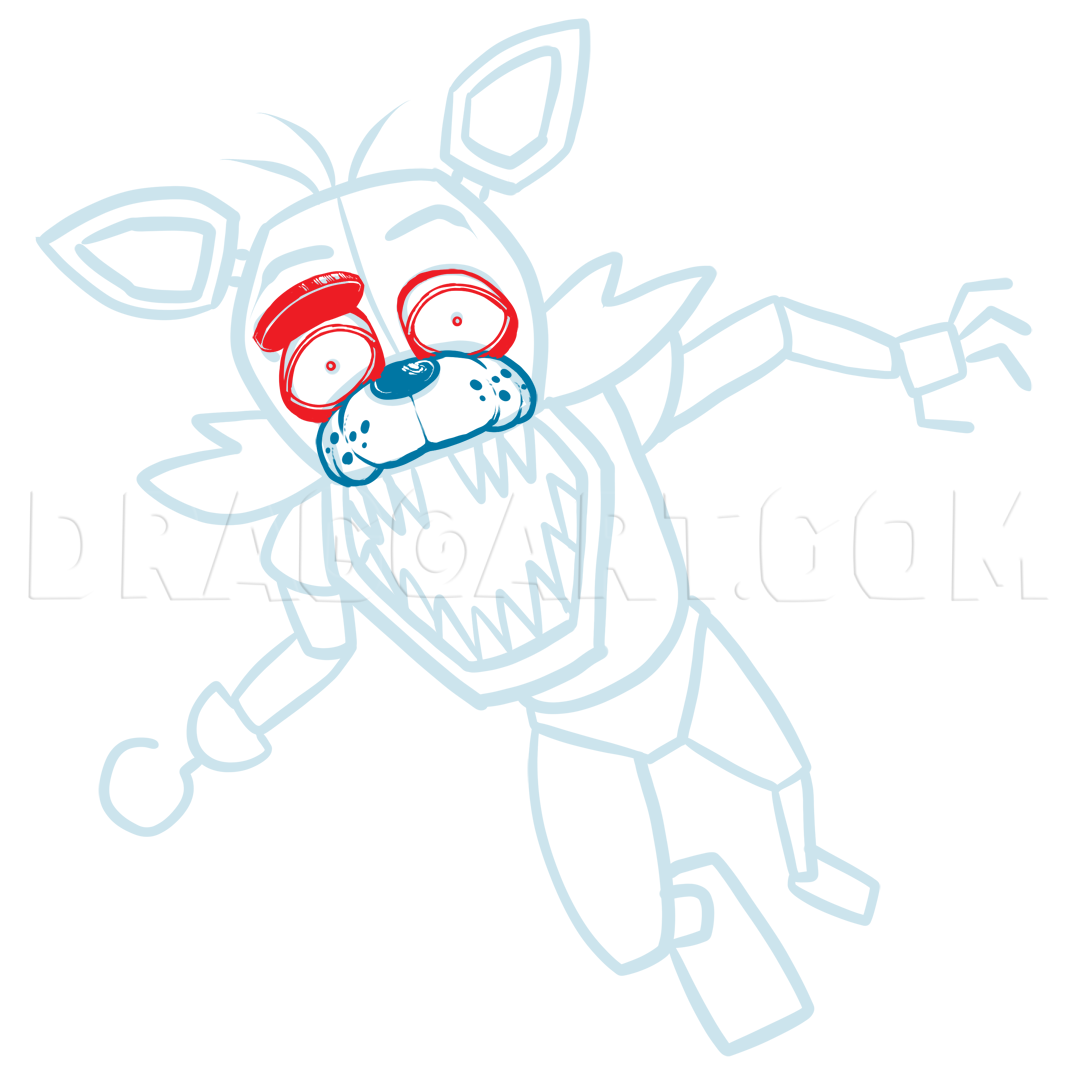
2
Add a small nose at the top of the snout. Then outline the eye holes. The ears essentially have five sides -- the flat side toward the head, and a curve on each remaining side that I've broken down into two straight sections. This already looks like

3
Next we'll draw the fur sticking out on each of Foxy's cheeks. These are drawn as simple shapes, almost like a tooth or something. Below that, we'll draw the toilet-bowl shape of the mouth. This looks freakishly large, but from what I can tell from t

4
From this angle, most of Foxy's body is obscured by his head. The chest itself is, I think, narrower than Freddy's. I drew it narrower, in any case. A simple ball will do for each shoulder for now. Then draw a triangle shape or a pair of underwear fo

5
Foxy is running at us, so one leg will be raised up, and one will appear as if it's moving away from us. Start with the thighs, and draw one thigh as a large sausage shape. The opposite leg will start thick at the hip and grow narrower toward the kne

6
I wanted the arms to looks like they're flailing around a bit, so each arm will have a different angle. On the hook arm, the upper arm hangs down and appears short in perspective, and the forearm bends outward with the wrist pointing upward. On the h

7
Next we'll fill in the basic shape of the the main details -- a rim inside the ears, the ear connection, hairs, eyebrows, etc.. Over one eye, there's an eyepatch that (for some reason) flips up when Foxy is on the attack. His mouth is full of large,

8
Now we'll start to go into extreme detail for this guy. All the main shapes are laid down, so we just need to refine them. The nose is filled in black, and we'll add one big highlight and a thin highlight around the edges. The snout breaks up into a
9
You may have noticed I'm using slightly rougher lines in this drawing to create a dirty type of feel. These Animatronic characters were once in pristine condition, but are now old and (in Foxy's case) falling apart. The rough line art also helps to m

10
This may seem like a big jump, but we're mainly just outlining out guide drawing here. The head and cheek fur blend into one shape, with some wrinkles added to the forehead. I've also added the black strap of the eyepatch. With the main shapes outlin

11
The main difference on the lower jaw here is the addition of wrinkles. The outline curves overlap to create that effect, and some small scratched help to give the jaw some dimension. Start the teeth with the two upper center teeth. These shapes will

12
I got a little rough with the line art on the ears. Since the face is our focal point, not all of the remaining shapes have to have perfect, ultra detail. Of course, you don't want to get too sloppy. I evened out the shapes a bit so the ears match be

13
Fill the mouth in black, leaving a white outline around the edge of the lips, and beneath the inner teeth to create a creepy effect. From there we'll outline and detail the shape of the torso. This is where we see the first tear in the Foxy suit, on

14
The upper legs are transformed quite a bit here. On the raised leg, we see a giant tear that exposes the mechanical leg underneath. At the knee, there's an exposed hinge joint, so the curves become vertical. At the hip joint, we see a gap between the

15
Another similar story here with the shoulders. The shoulder shape becomes more of a teardrop, but large tears expose the skeleton beneath. Each shoulder has a hinge joint similar to knee. Drawing dark lines inward from the outer edges creates a refle

16
We see more of that bar on the upper arm as it travels down toward the elbow. The same goes for the hand arm, where the bar is drawing continuing from the shoulder all the way toward the elbow. Make sure these sections of bar line up properly. The re

17
I got a little creative with the forearms here. The hook forearm is very wrinkles, with thin strands of fabric acting like torn skin on a zombie or something. Thin metal bars are seen within the tear, surrounded by heavy black shadow. The hook hand i

18
I forgot to mention the shading on the endoskeletal bars, but we have plenty more to work on here so listen up. After adding a couple of fabric chunks to the rear knee, we'll focus on the bars. The main idea to shade the bars is to draw a thick black

19
Each foot is a flat, metal shape. It's thick at the toe joint, and narrower at the heel. Each foot as two simple toes that stick out at a slight angle. I used a series of black shapes and long dash marks to create dirty reflections on the metal. The

20
Erase your guide lines, and you should end up with something like this. Pretty wild, if I do say so myself. I think he turned out pretty nicely. Let me know what you think. I hope you enjoyed it. I'll try to do the remaining Freddy's characters ASAP,
Comments 1
Details
Released
October 13, 2014
Description: Back with another Five Nights at Freddy's tutorial. This time it's Foxy the Fox, who is perhaps the most different in design from Freddy himself. There's some interesting stuff going on here, so I hope you enjoy.
Tags
#how to draw five nights at freddys #how to draw five nights at freddys characters #fox drawing


1 - Super Cool


