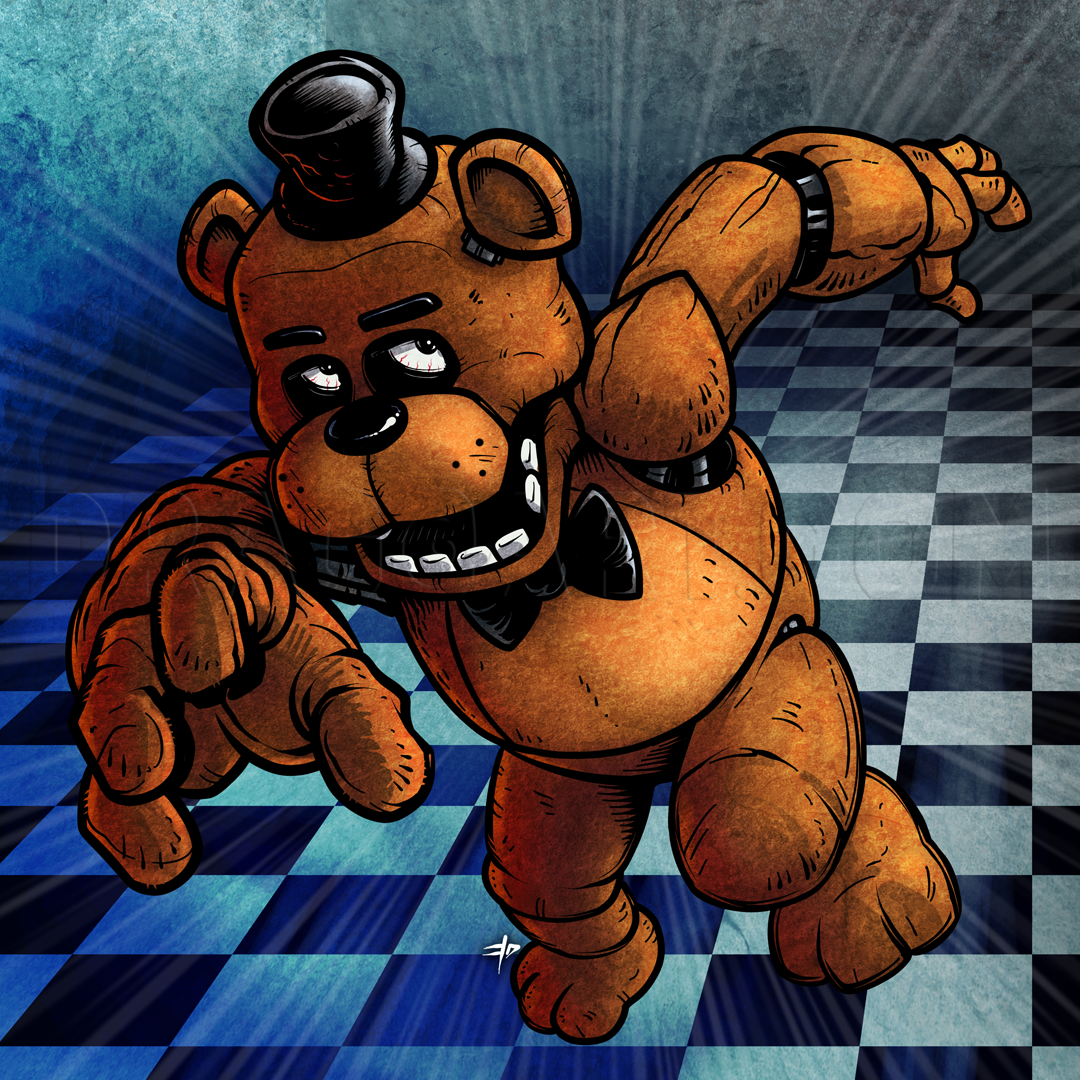
How to Draw Freddy Fazbear, Five Nights at Freddys


1
To start off, we'll draw a circle for the head and two 6-like shapes for the arms and hands. This is just for basic placement and positioning.

2
Lighten that doodle and we'll begin the actual guide lines. The under drawing will be pretty complex, at least on the head and face. Here we're outlining the top of the head, and then drawing curves outward for the cheeks. The curve in the middle is

3
Even though Freddy is a cute bear (sort of), he's also essentially a machine, so we have to think about perspective and stuff like that in order to draw him properly. Here I've drawn the nose or muzzle shape as a sort of box, using thinner lines to s

4
This looks like a Grateful Dead bear now. Simple ovals for the eyes and nose for now. We're not getting into accurate details yet -- just proper placement. Boxy shapes for the lower jaw and inside of the mouth. Somewhat boxy shapes for the ears.

5
Just marking the rest of the head details here. More shape to the ears. Added the bow tie. The top hat is seen from above, so start with an oval, working down to create a cylinder. Then draw another oval for the brim of the hat.

6
I decided the lower hand will be coming toward the viewer with some foreshortening... so it's going to be big. I start by drawing the tip of the pointer finger as a large oval. Then I draw the remaining finger tips as overlapped shapes. The upper arm
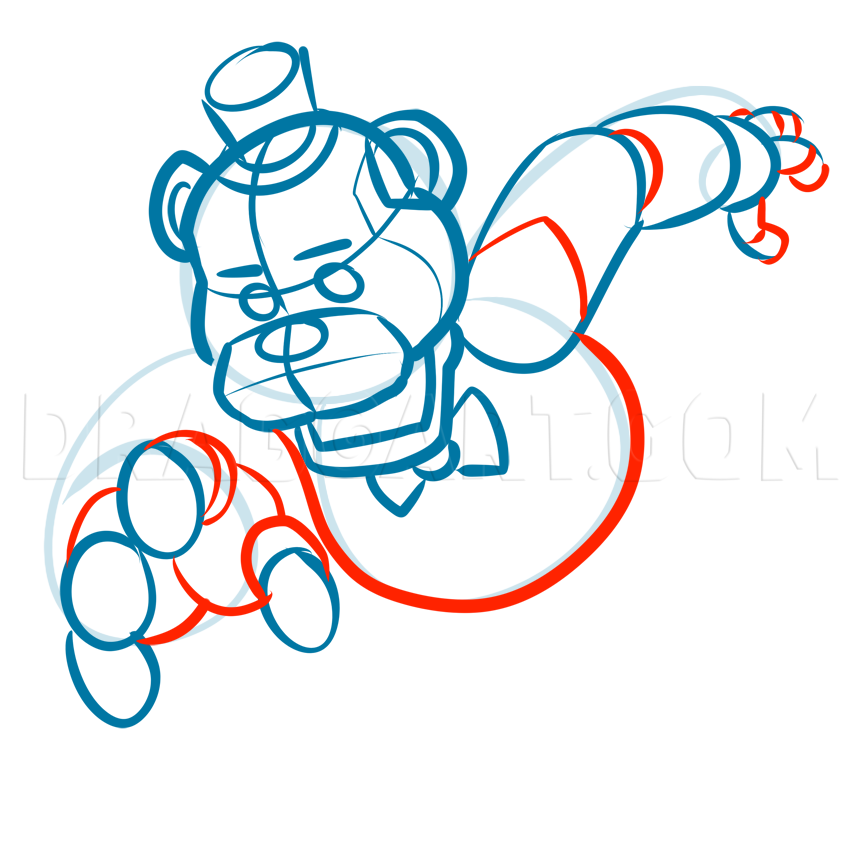
7
On the lower hand, what we're doing is drawing ovals behind one another. When something's coming at you, some pieces of it will be obscured by the front-most part. Forward-most? You know what I mean. Once again, start with the pointer finger. Then do

8
Same principle is in play for the lower/forward arm. Draw an oval for the forearm, the upper arm, and finally the shoulder. Each shape gets smaller the further it is away from us. Next we want to draw a large sausage shape for one of the lower legs.

9
Continuing on the same leg... The knee is raised up, so the lower leg is hidden. We'll draw a boxy outline for the shape of the knee. Then we'll use large curves to create a cartoon foot. I'm honestly not sure what the feet are supposed to look like

10
Lighten up what you've drawn so far, as we'll get into the final line art, or inking. Sometimes I like to finish one piece of the drawing at a time -- the hat, the ears, the arms, etc... but sometimes it's most comfortable to stick to one area of the

11
That little notch I drew into the hat brim makes it easier to pick up that curve without it looking off. Freddy's a bit old and run-down, so he's got some dings and scratches here and there. More than enough of an excuse to have some messy line art.

12
Here we'll define the shapes of the nose and upper mouth better. It's a lot more round and shapely than before... Actually, it's kind of like a butt. Use a thinner line for the center line, and try to have your lines get thinner as they approach the

13
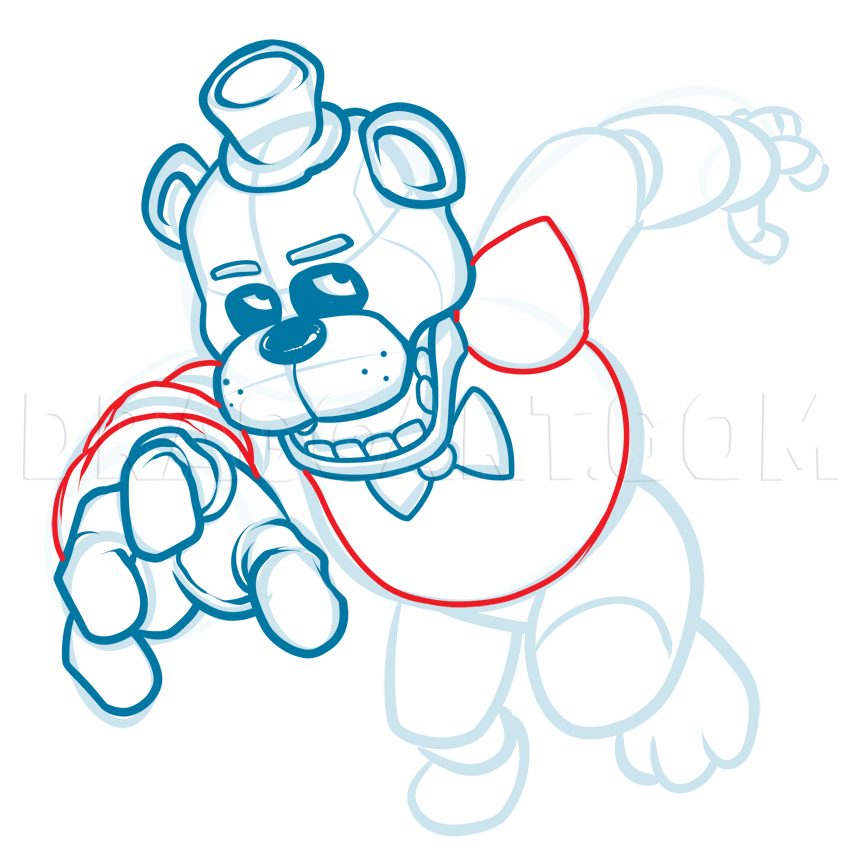
Next we'll add in the eye sockets as a pair of boxy shapes. Then we'll draw the eyeballs inside of them. From this angle, the eyeballs are partly covered up, but the space below them creates a sort of creepy expression. The eyebrows are simple rectan

14
Fill in the eye socket around the eyeballs. Let's also add some shadow on the eyes themselves. Then add the pupils. Good, he's looking creepy. Next we want to add a little more shape to the lower jaw. Just refining it a bit.

15
Now we'll add in the teeth. Each tooth is a rectangular shape. Four in the front. Two on each side. From this angle, we only see the lower teeth. I'm not even sure if the mask has upper teeth, but whatever. Below the chin, we'll create a clean versio

16
Revisiting the hand... This can feel a bit repetitive, but what we're doing is adding a bit of realism to the fingers now. Use more control in your lines, and leave the shapes open as you draw them. The back-and-forth curves create the appearance of

17
More definition on the fingers and hand. I really like the way the thumb knuckle curves outward before coming back in toward the hand. Starting from the lower portion of the thumb, a series of curves builds the rest of the digit, and then the padding
18
Use more wobbly, organic lines to finish up the arm. This create the appearance of difference shapes within each part of the arm, and adds some texture. Think of a raisin or something like that. The body and shoulder are drawing a bit more smooth. Fr

19
The exposed joint areas betray the fact that Freddy is actually a robot -- an animatronic character. Those bar shapes within the joints are hydraulic cylinders. Just draw some thin bars with segments. They group together toward the narrow shoulder jo

20
We're just using a bit more control when inking the remaining arm. On the fingers, start at the base of each finger and use opposing curves as you outline each segment of each finger. So for example... ( ) ( ) ( ) Over-curve, under-curve, overcurve,

21
Add some hydraulic detail to the inner elbow joint and fill the rest in black. Below the body, we want to use refined lines to draw the thigh and knee. I felt the outline was too thick at first, so I erased small portions within each line to break it

22
Cleaner, bold lines on the rest of the legs and pelvis. Once again, I decided to mess with the lines on the larger foot, and a few areas on the underside of the opposite leg. I feel like this helps make the legs recede downward and away from us, so t

23
Fill in the mouth with black. For the eyebrows, leave a bit of white highlight along the upper right edge. On the hat, we'll add a dark shadow to the center, left and bottom sides. The light is coming from the upper right. We'll add a little highligh

24
A few details before going into hyper detail: The mechanical joint at the base of the ear can be drawn with small boxy shapes. The bowtie is filled in black, in a similar fashion to the hair. Leave highlights to create wrinkles in the fabric. It's li

25
Erase all your guide lines, and you should have something like this. In black ink, it looks pretty bold. The creepiness start to show itself the more you look at the details -- the eyes, hands, etc... A lot more character and atmosphere can be create
Comments 0
Details
October 3, 2014
Description: Hey, guys. I'm back with a new tutorial based on Five Nights at Freddy's. I'm trying to crank out the characters before the craze cools off entirely. Cartoony character made creepy by the details. Hope you enjoy!


