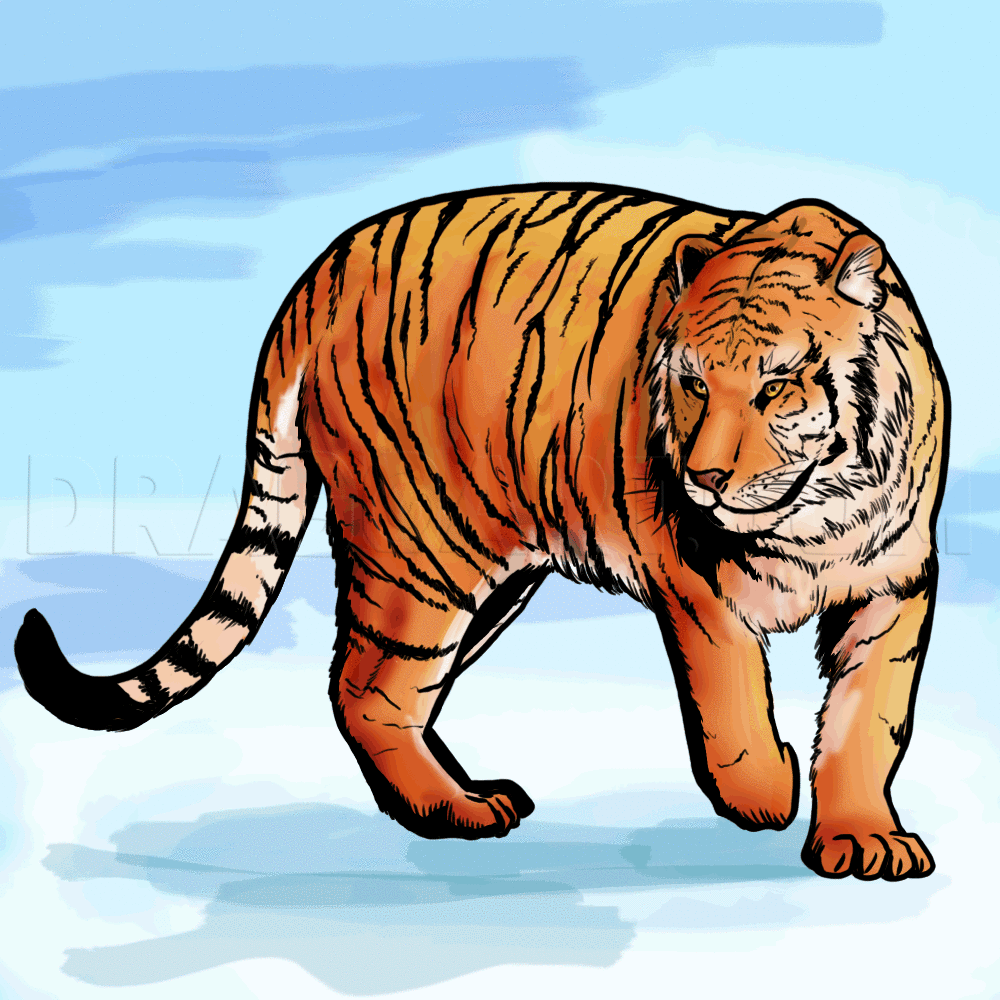
How to Draw a Bengal Tiger, Draw Tigers


1
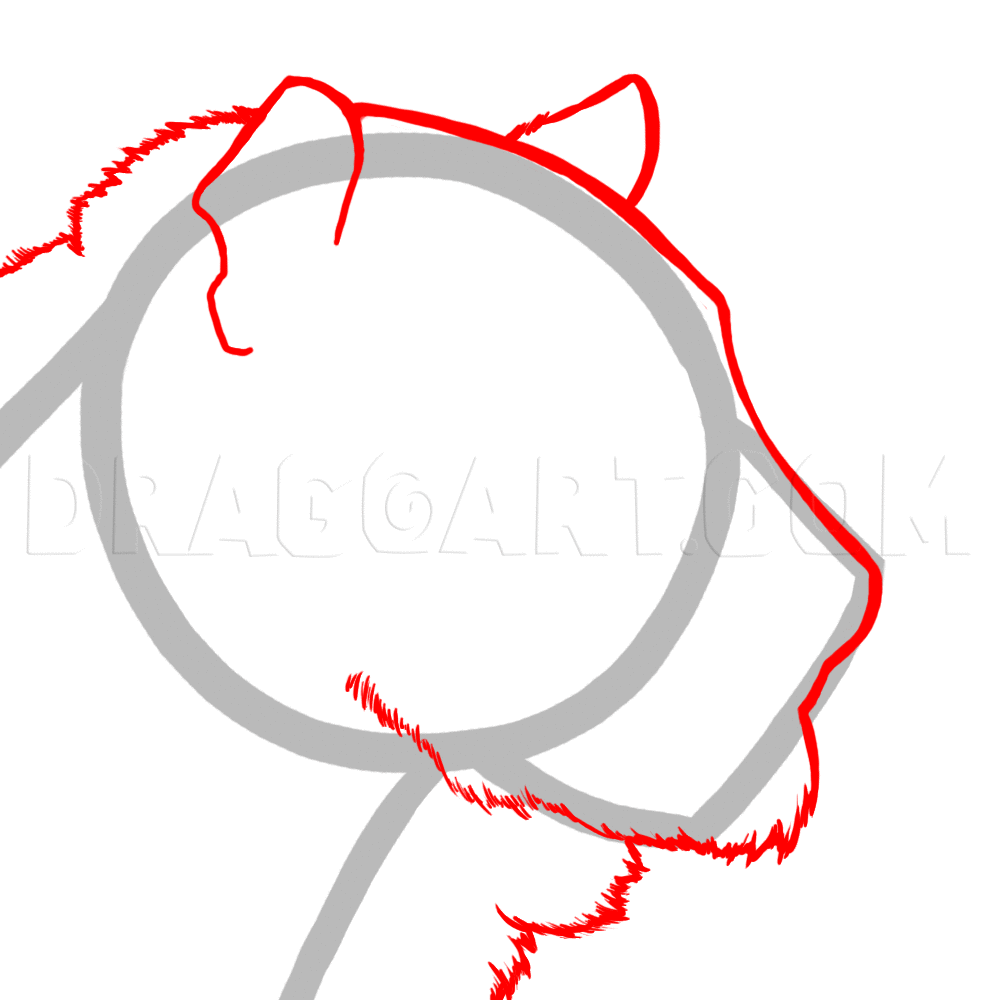
Let's first start by doing some quick exercises in drawing the head of a Bengal Tiger. We will first do a profile shot. To draw the construction lines, Use a 2H (or harder) pencil and lightly sketch a circle for the general shape of the head. For the
2
Next, draw the contours of the head over your construction lines. Bengal tigers live in very cold climates so their fur is thicker and longer than most large felines. The fur on the face is very smooth, but gets fluffy under the chin and around the n

3
Continue adding detail to the head by drawing in the eye, nose, and mouth. The lower lips on a tiger tend to hang a little low, and there is usually a large black spot beneath their lips that blend the two together. Add in more tuffs of fur, especial

4
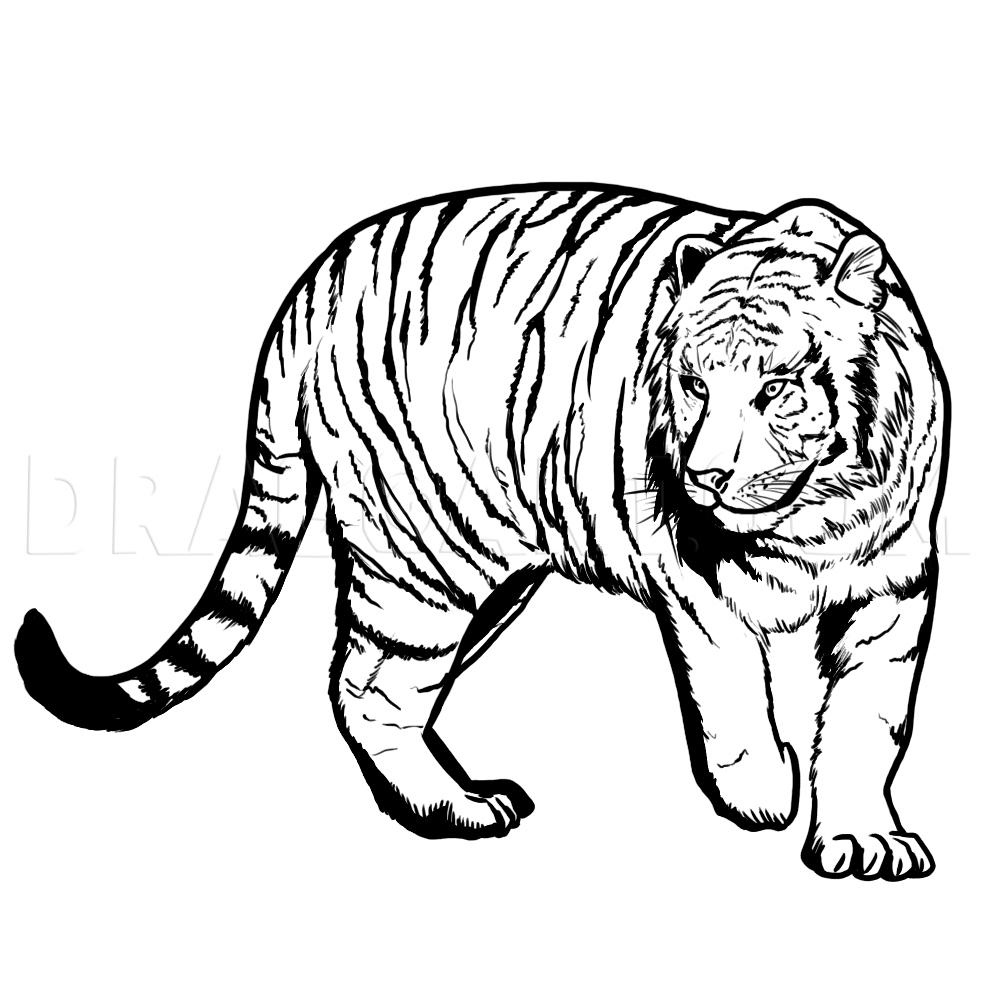
Finish the head by adding in stripes and whiskers. Don't forget that tigers have a few whiskers above their eyes. If you've inked the image, be sure to go back and erase your pencil marks so that you have a nice, clean, black and white image.

5
We can do another quick head study, this time a frontal view of a tiger roaring. Starting with construction lines, sketch out a head circle. Sketch in the center line of the face, and the eye line which is two-thirds of the way up the face. Draw neck

6
Since this is a frontal view of a tiger's face, it's best to start drawing in the features of the face before the outline of the head. Draw the eyes along your eye line (the eyes are about 2 eye widths apart from each other). Draw in the nose along w

7
Now would be a good time to draw the outline of the head and neck. Remember, the fur near the face is smooth but it gets thick and fluffy as it gets closer to the neck. In this case, the fur on top of the head is smooth. Since the tiger is roaring, a

8
Now draw in extra wrinkles around the nose and eyes. Also draw in the stripes, and whiskers. Shade inside the mouth and around the lips. You can also add a bit of rendering to the image by inserting hatch lines on the tongue to give it more depth and

9
When creating stripes on a tiger, start at the top of the head and work your way down. The stripes on the faces trickle down behind the ears and around the eyes and along the sides of the face. Tigers do not typically have many stripes above their no

10
These cats have huge paws made for gripping their prey. Their claws are retractable and so they are only seen when in action. Their paws consist of four digital pads, one dew claw on the side used for gripping, a large metacarpal pad in the center, a

11
Here are some various angles of a tiger's eye. They eyes hold a lot a great deal of emotion and help tell the viewer what the animal is feeling. Tiger's have round pupils and large iris's that cover nearly the entire visible part of the eye. When lo

12
Now that we've done a few exercises, let's start on our full figure. Start by lightly sketching in a head circle and place square shape at the bottom of the circle to represent the nose and mouth. Sketch in the center line of the head and the eye lin

13
Next, let's draw in the head, but don't worry about adding in any stripes or too many tuffs of fur just yet. Draw the eyes along the eye line, insert the nose and mouth, and insert the ears. Tiger's ears have rounded tips, rather than pointy the poin

14
From the head we can work on drawing the back of the neck and the front legs and chest. Since the head on this tiger is lower than it’s back, we need to be sure to draw a hump behind the top of it's head for the neck. Remember that the fur along th

15
Now finish the outline of the figure by drawing the back, tail, hind legs, and underbelly. Give the tail some personality by having the tip curl upwards. Be sure to draw in the back left leg as well, otherwise the image will lack dimension.

16
This is a good time to switch from pencil to pen. Using a brush, brush pen, or crow quill, carefully trace all of your pencil lines. After you are finished, use a kneaded eraser to erase all of your pencil lines. This will leave you with a perfectly

17
Go through and add more tuffs of long fur to the image, especially beneath the neck. A brush or brush pen tends to work best for this, but some people prefer crow quills. Also take this opportunity to draw in the whiskers, using a thin marker such as

18
We can now add in the stripes! Start from the top of the head and let them trickle down the sides of the face and down the back. Remember that the stripes get longer as the contour to the shape of the tiger's torso. No two stripes are alike, so let y
19
To finish the image off, we should add some shadows. Establish your light source, in this case it will be at the upper right hand side of the page. You can add additional levels of depth by blending the shadows into the light areas by feathering with