How to Draw Forests, Forest Backgrounds

1
So typically, forests are basically a mixture of trees ranging from evergreens, to maples, all clumped together.(In most cases) little light reaching the forest floor. The most common of trees that crowd the area of forests, are evergreens, very tall

2
Here, we study the various types of stumps for our trees. Typically, we'll be drawing these landscapes from 1st person level view, which means you'll be seeing the forest at human eye level. So with that being said, we have to draw the stumps either

3
Now, if you're going to digitally color your drawing, (either through Photoshop or any other vector program), I would recommend knowing your limits with color. If you study many references of forests on Google, you'll realize that the colors (dependi

4
Here's just a combination of colors you can use for your trees. Note that the darker a shade of green gets, the analogous hue starts to kick in (green sides with blue on the color wheel, just as yellow sides with green). It's important to know your c

5
Start by making the slope or ground line for the forest floor. Once that is done draw out the guidelines for two trees.

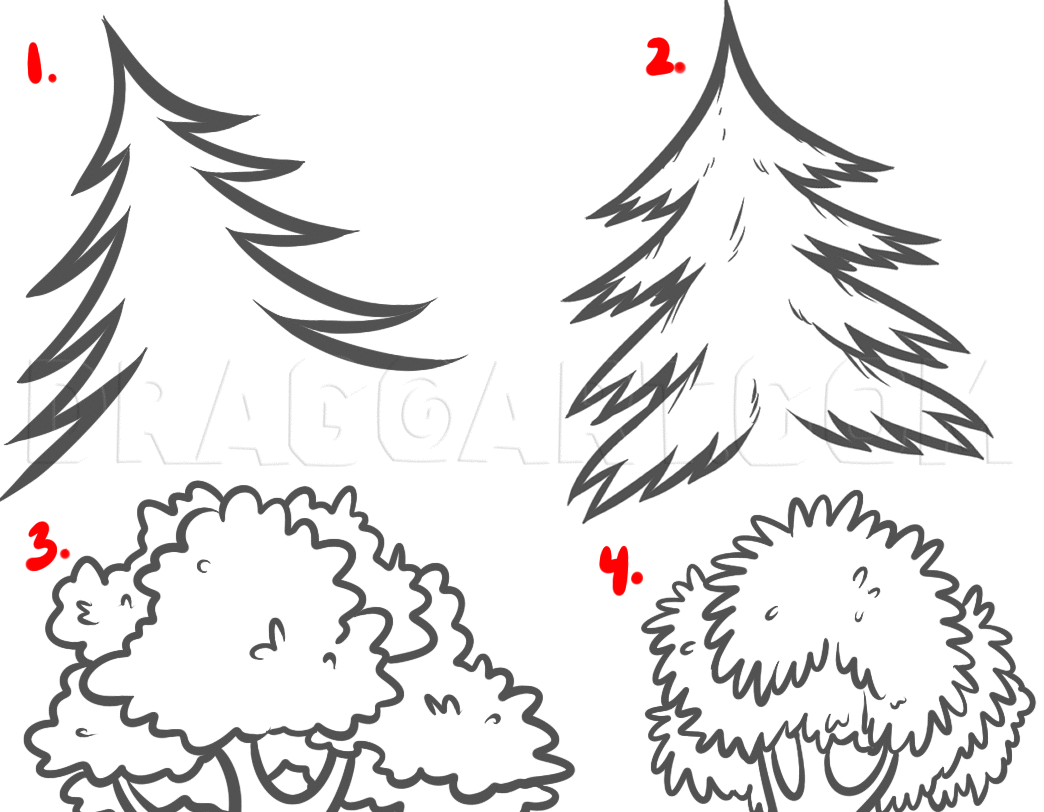
6
Begin sketching or drawing out the bushy or crimped looking form of the trees like you see here. The shaping should be random and not uniform.

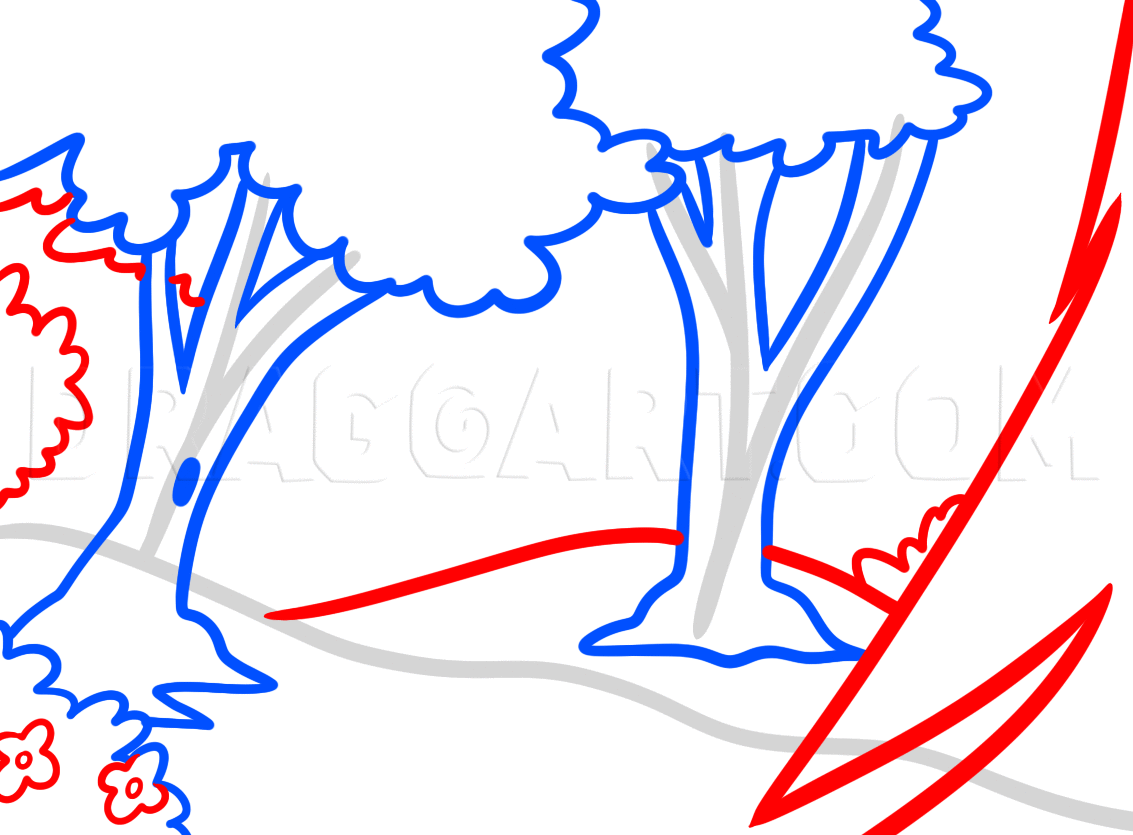
7
Draw out the trunks of the tress like so, then draw in the thick roots that are above ground. To the left you will also need to draw out a thick bush. I added a small cute squirrel or bird hole in the center of the tree to the left.
8
Add some flowers on the bush, then draw in more of the forest landscape which should include the mounds or hills on the ground. Draw in a biog pine tree in the foreground of the scene, then add more bushes or tree tops that are peaking through the si

9
Almost done folks. Draw in more trees until the forest looks full and very bushy. Of course you can color in your landscape of the forest to resemble an autumn setting.

10
Remember to include thin lines for the detailing of the tree trunks which you will be doing in the next step.

11
Lastly, sketch in all the trunk detailing and definition on the trees, then draw in some flowers, grass and distant pines. When you're done you can erase your mistakes if you made any.

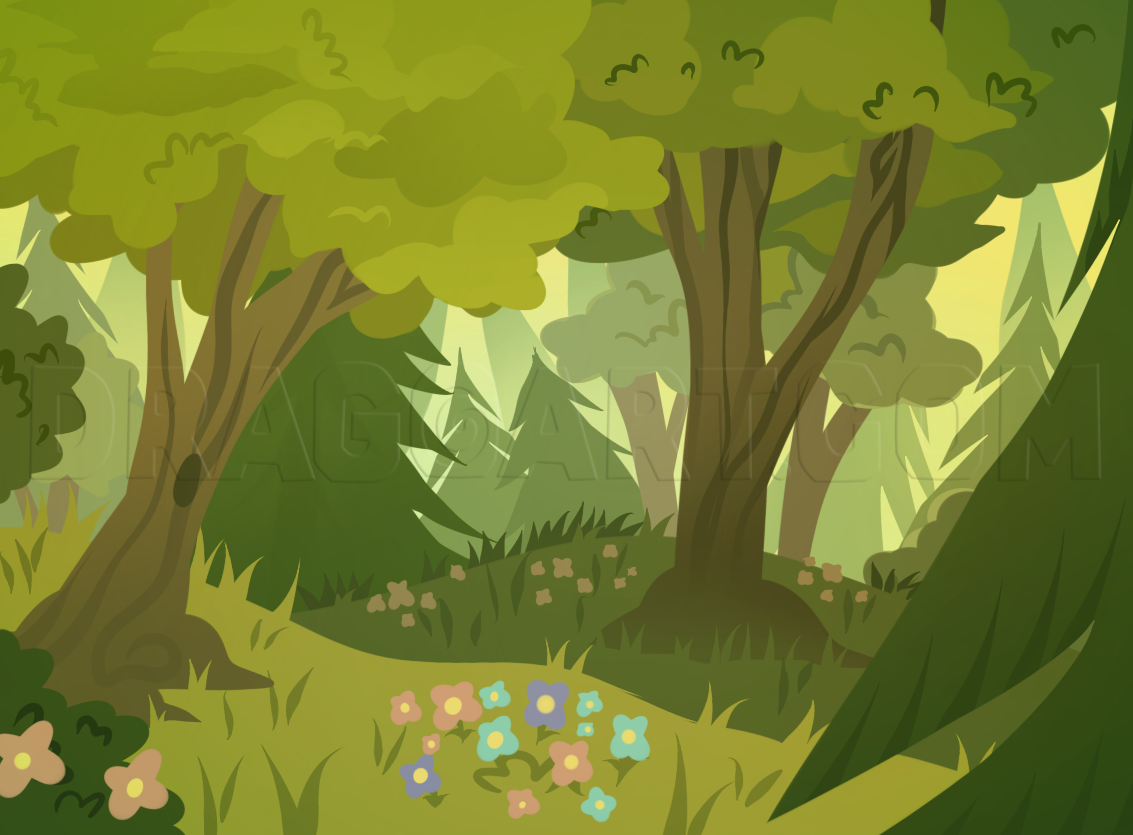
12
Here is how your forest setting comes out looking like. Now you can color it all in. Have fun doing that!
Comments 0
Details
August 10, 2012
Description: Well I’ve reached the end of my tutorial day and what I have for you can be used for all types of drawing backgrounds. Today I will show you "how to draw forests", step by step. There is literally many ways to create a forest scene, but sometimes thinking about ideas to have in your forest drawing can be a little frustrating because when it comes time to draw a forest, one will sometimes forget what exactly should be added in a forest setting. Everyone knows that there should be trees, flowers, and all sorts of wildlife, but what else? Hopefully this tutorial will aid you in that decision and or question. I love drawing sceneries as some of you may have noticed when you see certain background images drawn for certain characters or creations. Drawing trees, bushes, and other foliage is pretty neat to create because you can really let your imagination go wild. Remember, fantasy lives in the mind, and when you use art to your ability you can bring your fantasy an artistic reality. I hope you enjoy drawing forests as it was entertaining for me to make. I may be back later, or I will return tomorrow, who knows. Good luck folks and make sure to upload your work when you’re done.


