How to Sketch a Horse


1
For the first step make a round shape that is sort of oblong shaped. Sketch in a facial guideline and proceed to step two.

2
Before we start sketching out the horse's face and or head structure, we will work on getting some of the mane sketched out. This part of the mane is called the 'forelock'. It is the hair that hangs between the ears, and falls onto the forehead of th

3
Next, begin sketching out the horse's face starting with the bump where the eye is located. Next, continue to sketch downward until the muzzle is sketched in. This should also include the mouth and nose of the horse.

4
Now that some of the main parts of the horse's face and head is drawn out, we can continue the momentum by making the lower portion of the mouth like so, and then draw the chin grove, and then sketch the actual structural shape of the side of the hor

5
At this point you have yourself an outline of a horses head. You will now begin drawing or sketching in the face. Start by adding the tissue inside of the ears, and then draw the dark, almond shaped eyes using the facial guide you added in step one.

6
Next up, start this step by sketching out the crest of the horse which looks like the back of the neck to us. You will then draw the front part of the neck which is also home to the jugular groove. That line you see starting from the side of the jaw

7
Here is what the basic sketch looks like when you are all done. Obviously all the detailing comes from shading and other lining effects.

8
Before we even TOUCH the facial shading any further, we must evaluate the importance of the 'light source'. In the case of this drawing, we will determine the darkest shadows hitting the brow, and nostrils of the horse. These are the key darkest area

9
This is a progressive look at how I shaded and detailed the horses eye. Notice how shiny and realistic the eye comes out when it's all done.

10
Start the base coat for the shading process before detailing can start. darken certain areas for a more defined look, as well as where certain areas of the horse is hollow like the nose and inside of the ears.
11
Thicken or darken the outer lining for the horse until you have a sketch in front of you that looks like the one you see here.

12
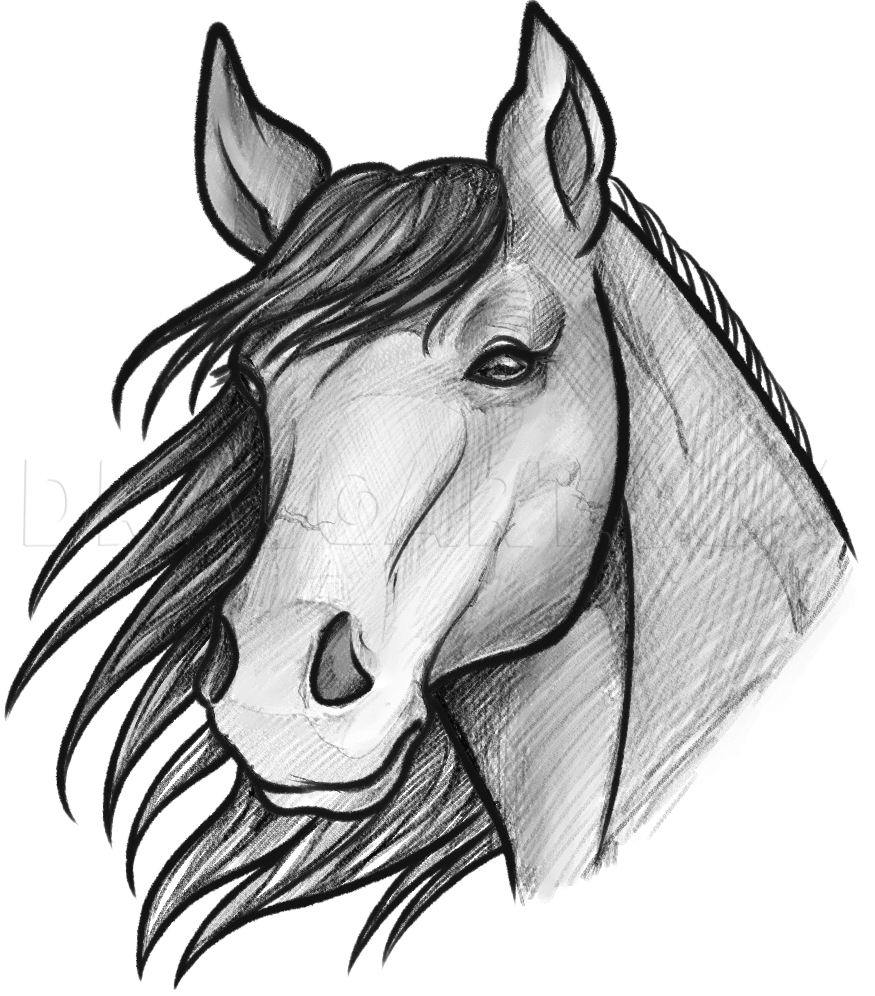
When all is said and done, here is what the beautiful sketch looks like once you are finished with everything. Of course your sketch will look different than mine, but that is the beauty of art, everyone has their own drawing and sketching style.
Comments 0
Details
March 24, 2012
Description: Ok guys, I've been having a lot of fun lately with these sketching tutorials. There's this new program I'm trialing on and I've gotta say, it's just straight up awesome for making sketches look so graphite like. I am using 'Corel Painter 12', and it's best for artists who are used to traditional media. This program would be perfect if you're not too familiar with digital drawing, and more so traditional. Anyways, this new tutorial will be on 'sketching a horse' in the easiest fashion. I will break down the steps to create the overall composition as well as tips and tricks to use to have the same sketchy effect. I hope you guys will enjoy this one, and I plan to have more tutorials like these in the future! Have fun!


