How to Draw a Bed


1
Okay the first thing you will need is a ruler if you do not know how to draw lines to good. After you equip yourself with the tools needed, start this step off by drawing a big square box. Then you will add the rectangular side and front of the bed t

2
In this next step you will start to sketch in the wrinkled lines for the edges of the pillow and then start drawing out the blanket for that covers the bed. When you are done you will then add a leg in the upper left corner and then add the shape of
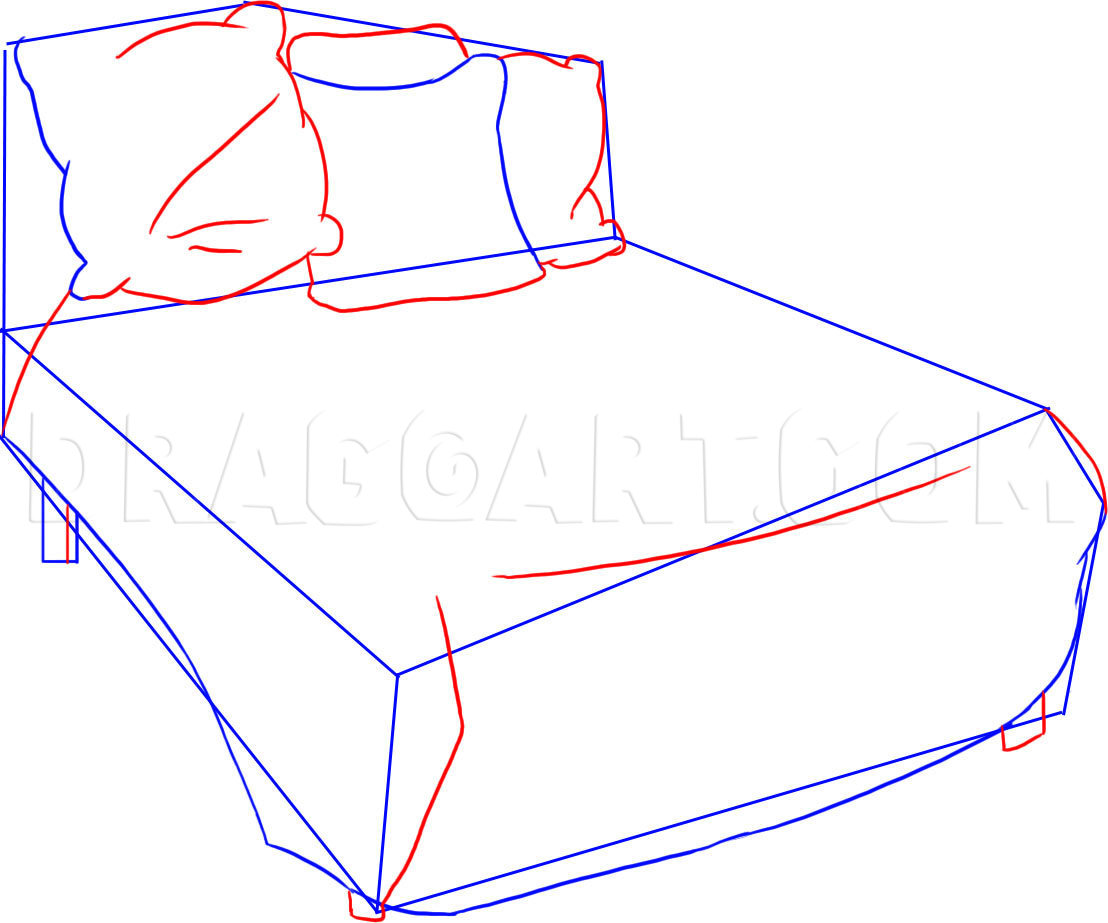
3
You will tackle this step by drawing out the rounded edges and shapes of the rest of the pillows as seen here, And then you will start to add crease lines on the bottom foot end of the beds blanket. Add the other bottom legs and then shape off the co

4
This is your last drawing step and what you will do is detail and define the pillow and blanket as shown with some wrinkle and crease lines. Once you are done you can start erasing all the guidelines that you drew in step one to clean up your sketch.

5
When you are done your bed should come out looking like this. All you have to do now is color it in the way you want. I hope you liked this tutorial on how to draw a bed step by step. I will be back soon with more drawing tutorials in a while so hang
Comments 0
Details
October 5, 2008
Description: In this next tutorial you will be learning how to draw a bed. Yes I said bed and why should that be so weird. I mean are you gonna tell me that nobody would like to learn how to draw this piece of household furniture? I think not. I can remember when I was a kid (like 10 or 12) I used to sit there for hours trying to figure out how to draw this simple thing. At first you think that a bed can be drawn just by making a long square shape and then you can throw a few smaller shapes on there for pillows. But that is not the case at all. I don't know about you, but when I draw a bed I want it to at least resemble something that is comfy to look at. We all have beds in our homes whether it is a bed of blankets, a box spring and mattress, a pile of hay, a bed of rocks, or even a bed of roses. The bed is dated back to the ancient times when folks made thick layers of straw piled on top of each other to form a place to rest, sleep or relax. The piles of straw were usually covered with some form of blanket or cloth that made it that much more bearable to lie on. Over the years beds became more and more developed over time. Before a boxspring was invented folks use to place their feather filled mattresses on top of coiled springs to add support and comfort to the mattress. It wasn’t until the eighteenth century that beds became somewhat in resemblance to what we use today. The “bed” comes in many different sizes to fit the preference for the individual that is buying them. There are several sizes to chooses from such as; a twin or single which is 39 X 75 inches, then we have the double or full which is 54 X 75 inches, the queen which is 60 X 80 inches and then the king sized mattress which is 76 X 80 inches in size. So, as you see, the bed can be bought at any size and you can make it as comfortable as you wish with a different variety of sheets, blankets and comforters that are available on the market today. This tutorial will show you how to draw a bed step by step. Even if you are a kid you should be able to tackle this tutorial. I chose to assemble my bed with the most comfy looking pillows and blankets so that when you are done you can just pass out afterward. I hope you like this sweet lesson. I will be back with more so stick around.


