How to Draw Realistic Lions, Draw Real Lions


1
So, when drawing anything it always helps to draw a few practice sketches. This were my sketches which were referenced from photographs. I used charcoal on charcoal paper and have actually decided to switch over to charcoal drawing for my next few tu

2
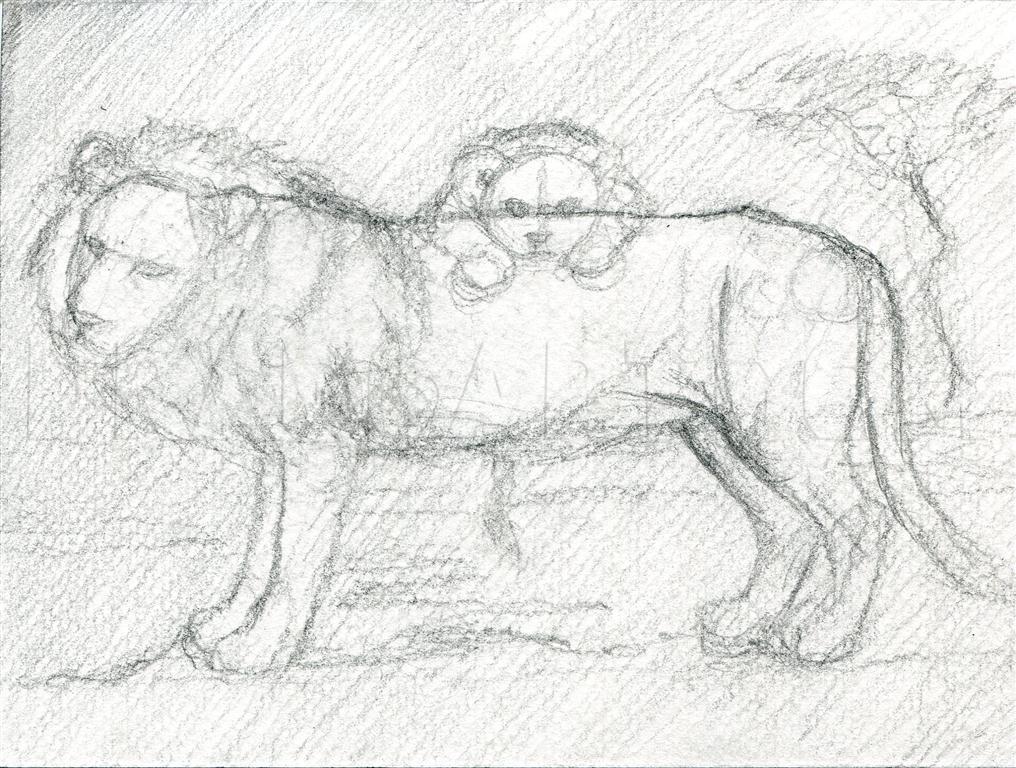
So, instead of looking for a reference picture to copy my drawing from, I decided to more or less freehand an idea. This was the basic idea that led to the final drawing.

3
Here are my main tools. I also used a kneaded eraser and 6H and 3H pencils for lighter shading.

4
Alright, I know it's weird looking but here is how I started drawing the adult lion. Three squares for the body and some basic shapes for the legs. No head yet.

5
Move on by sketching in the head and hinting at basic anatomy.

6
Start sketching in the basic outline of the lion, body first. This WILL change, but just try to get an idea of it down now.

7
Start sketching in the head and erasing unwanted lines. Start sketching out the basic flow of the mane.

8
Sketch in the rest of the mane, and voilà! We have a sketched lion.

9
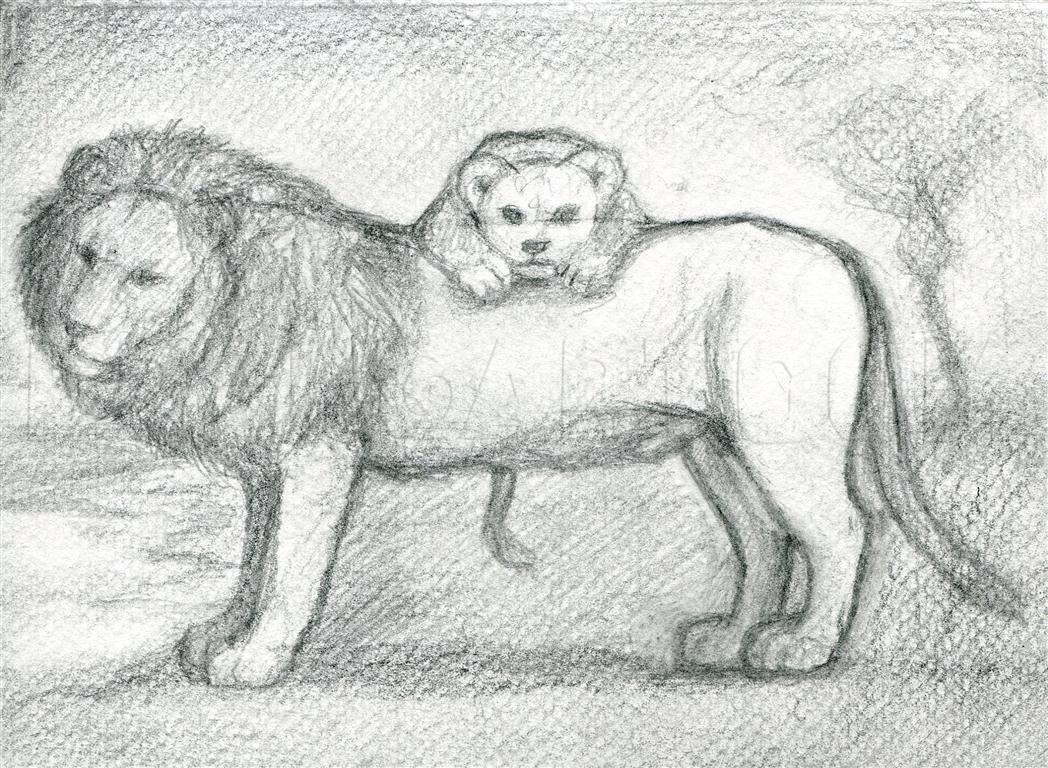
Alright, I just sketched in the little cub here. I also started sketching in the background. Just make sure the cub's head is smaller than the adults head and you shouldn't end up with too many proportion problems.
10
Use a fairly light pencil, HB or B, to darken the entire drawing a little bit. This will make it easier to start shading.
11
Now we can start outlining the figures more and shading in the darker values. I started darkening the lion's mane during this step.

12
Now we can take the shading even further all the while adding new details to the foreground and background. You can see the grass starting to form in this step.
13
Zero in on the lion's mane. Notice how my lines aren't just random; they follow the way that the fur would naturally flow.

14
Continue on by using darker pencils (2B+)to add in darker values. You can also use an eraser, preferably a kneaded one, to softly lighten up some values here and there.

15
Keep lightening the drawing with the eraser. If you choose the same background as me you can start darkening the dirt as well.

16
So, we can now swoop in with more detail starting with the left side. You're pretty much open to use whatever grade of pencil fits your needs. Also, don't let the grass overwhelm you. Just make quick, straightish lines in the direction that you think

17
Now we can move more to the middle and add more detail to the cub and just about everything under it. don't worry too much about making the facial features super realistic yet.

18
And continue on by defining the final third of the drawing.

19
You can see in this step everything that is in the final drawing. I'm sticking this in here to show how minute the details can get. Compare this step with the next one and see if you can spot all of the changes.

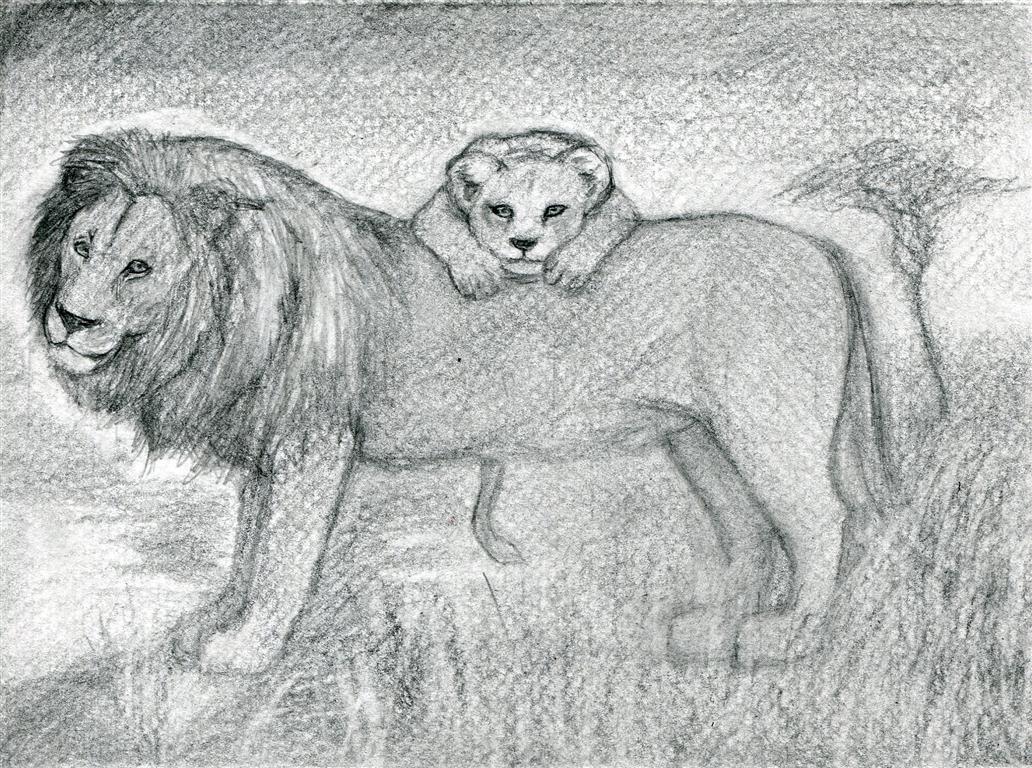
20
After going in and adding more minute details to the faces and the grass/ground I called this drawing done! I hope everyone can pull something out of this tutorial. Look forward to a realist cats tutorial in the near future!
Comments 0
Details
April 25, 2011
Description: Hey everyone, hope you all like lions, because that's what this tutorial is all about! Let's get started!


