How to Draw Chibi Clothes


1
First we need to start with a basic chibi form. I use this form often as it is my fall back chibi body so I'll go ahead and start with that.

2
I have seen many people try to clothe chibis like this. This creates a suction cup plastic type shirt that would be uncomfortable for anyone to wear and you need to avoid doing anything as just drawn lines on the chibi arms or body.

3
When people wear shirts, they are not plastic frozen and suction cupped to their body. They have movement! Notice the difference between the above and this shirt. Notice how airy and free this shirt is compared to the other one. Much more comfort

4
The key to this is making sure no part of clothing is just plastered to your chibi. make sure the shirt is on your chibi instead of part of your chibi. Notice the neck area how the neck is tucked into the neck of the shirt and there is an arch to s
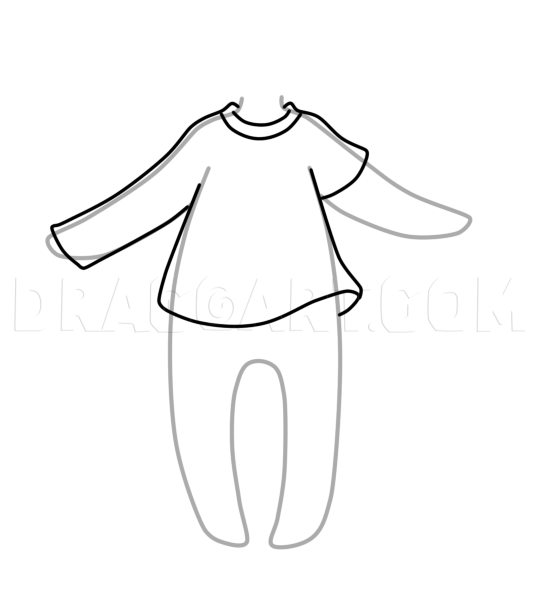
5
Long sleeves are not much different for your chibi. Notice the sleeve is still coming off the chibi, just less of a flair than the short sleeve.

6
Lets try something else. The most common skirt shown on girl chibis is the pleated skirt. This is mostly due to the pleated school uniform skirt. Notice the sides on the waist are tucked, not just part of your chibi. Basic pleated skirts are easie

7
When drawing skirts, movement makes them look more believable than just having them straight down. You can do this by curving your panels in a certain direction. Once you pick a direction, be consistent! It would look strange to have panels going

8
The final panels should fan out from your chibi body while continuing with the movement. This will also help with making the clothing look like your chibi is actually wearing it. Try not to put too many panels in when drawing a simple chibi because

9
Here are a couple other skirts to emphasize the way the skirt should fit on the chibi waist. Notice even the tight side skirt is still coming off the legs slightly on the bottoms. Even the slightest pull away can make all the difference with your c

10
Pants work a little differently, but not greatly. The top of your pants where it connects to the waist should be off the chibi to show that it isn't attached, but the upper leg can be very close or on the form of your chibi to show the tightness aro

11
Once you've drawn the basic form of the pants, you can begin to add more details to show that they are actually pants.

12
Here's a full look at pants. The hip area where the pants start emphasizes that they aren't attached, the upper leg is tight and then it flares out towards the shoe. Notice the dramatic curve/edge of the pants near the point of the toe. this is bec

13
Now for seams! Seams should be around the pockets and on the inner legs and outer sides of the pants and sometimes at the bottom. Since I only show the pockets, one inner and one outer leg, thats where I shall draw my seam there. Draw a dotted lin

14
Now that you know more about how to clothe your chibi properly, lets make one! Start with your basic circle, don't worry about perfection with this. It will mostly be erased eventually.

15
Now flatten out the lower part of your circle, this will be a flat chinned chibi. Also, draw in a basic stick figure form.

16
Now go ahead and draw the chibi body around your stick figure form and erase the part of the circle that got cut off by the chin.

17
Now make sure your chibis eyes and mouth will be in the right spot by drawing in some light guide lines. The cross eye line should be low on the face so your eyes aren't too high. Draw the mouth in the middle of the vertical line.

18
After the last step, you may now add your own hair or clothing to your chibi, or you can keep drawing mine! Now for some hair! Puff the hair out off the head a bit to accentuate the large head and add some choppy side swept bangs.

19
Lets draw a loose shirt that looks like it's being caught up in a draft. Make sure the sleeves open up to reveal the arm inside, and part of the shirt lifts up to show part of the stomach. This will make it look like the shirt has been blown up and

20
Now using the techniques I showed you earlier, draw some pants on. Don't forget the pockets, waist line and the flair at the lower leg/feet. Make the pants baggy down at the bottom.

21
Add in some detail to the pants, like a seam along the pockets, outer legs (as they are turned inward) and the very bottom of the pants. Also, add a seam to the sleeves and around the bottom of the shirt. You can also add in a line around the neck

22
Now to finish it up, add the rest of the lower part of the hair, eyelid lines and an eyebrow peeking through the bangs. Make sure to erase the line that crosses the neck before you finish!

23
Now you can clean up your lines and start coloring! Good luck and happy coloring!
Comments 0
Details
January 19, 2011
Description: Hey ya'll! I've been working on this little (not really little..) tutorial for a little bit while I sorted some things in my life out. I know I say in some of my tutorials that you can dress and clothe the chibis how ever you would like, but I never gave a tutorial on HOW I clothe chibis. So here it is! This will give my techniques for clothing my chibis so you can be on your way to drawing your own chibis! I hope you enjoy learning "<em><strong>how to draw chibi clothes</em></strong>", step by step!


