How to Draw Chibi Heads


1
The basic fundamentals of drawing a chibi head are pretty easy. All the chibi heads you will see me ever draw all stem from a basic circle. It doesn't have to be perfect, but go ahead and draw out a circle that's as evenly round as you can get it.
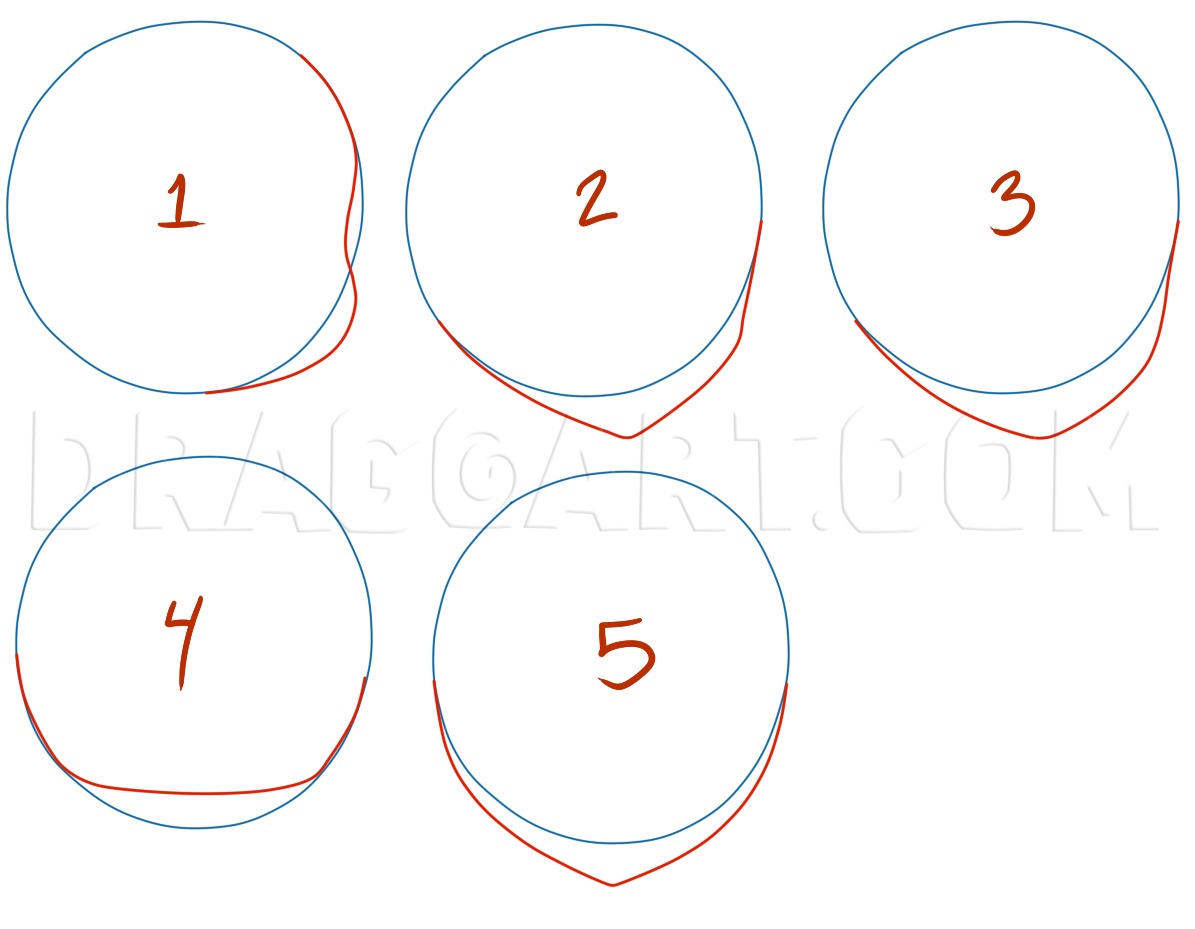
2
Now from your circle, you can create multiple different head shapes. 1 is a rounded cheek. 2 is the basic pointed chin. 3 is a rounded version of the pointed chin. 4 is the flat chin and my favorite. 5 is a frontal view of the pointed chin.

3
To draw a profile, you can draw an upside down egg shape and just add on a pointed, or rounded nose so the face isn't just flat. Most chibis don't have noses when doing the frontal or 3/4 view, however if you leave the face with just the egg shape,

4
Now choose your head that you wish to work with. I will be choosing #4 for my tutorial, but you are welcome to choose whichever you want to draw. I have drawn out facial guidelines that you should draw on whichever face shape you choose.

5
Here is my starting face shape. I have lightened the lines just so I can leave them up for you for most of the tutorial. Do not erase them until you are finished using the facial guide lines though!

6
Now for the face. There are a variety of different eyes you can use for your chibi! I will be showing you a few. These eyes are the least complicated to draw and are great for beginners but still leave you with a really great looking chibi. You j

7
If you chose a 3/4 head, make sure when drawing your eyes that the eye that will be furthest from you on the face is thinner than the one that will be closest to you. Do not shrink the eye or make it much smaller than the other, just make it thinner

8
Here is another eye type I will use for examples. For this chibi you do want to keep your eyes large because they are the focal point and will draw the most attention.

9
When drawing your eyes on you chibi, make sure the smile is always split down the center and even. Also, be very careful not to draw your eyes too close together or too far away.

10
The chibi eyes should be in the center of each half, and low on the face. This is another example of eyes you could draw, and the eyes I will be using for the rest of the tutorial!

11
Great! Now we have a chibi head and a face. Now you can go ahead and pick a hair style that you want to see on your chibi. I like the messy hair styles on chibis so I'm going to draw that. Make sure when you have parted hair on your chibi that you

12
Now we can draw in a neck and shoulders just so we don't have a floating head. Now you can either keep the line that crosses the neck, or erase it. Either is completely acceptable but I will be erasing mine.

13
Great! Now you have your very own chibi head! I hope this tutorial helped, and happy coloring!
Comments 0
Details
December 13, 2010
Description: Hi ya'll! I had a lot of down time today while taking breaks in studying for my finals and decided to go ahead and put out a tutorial on "<em><strong>how to draw chibi heads</em></strong>"! I put a lot of helpful tips and a few eyes just for fun. This should help those who need it grasp the basics of making chibi heads. I hope you all enjoy "<em>how to draw a chibi head</em>"!


