How to Draw a Cyclops


1
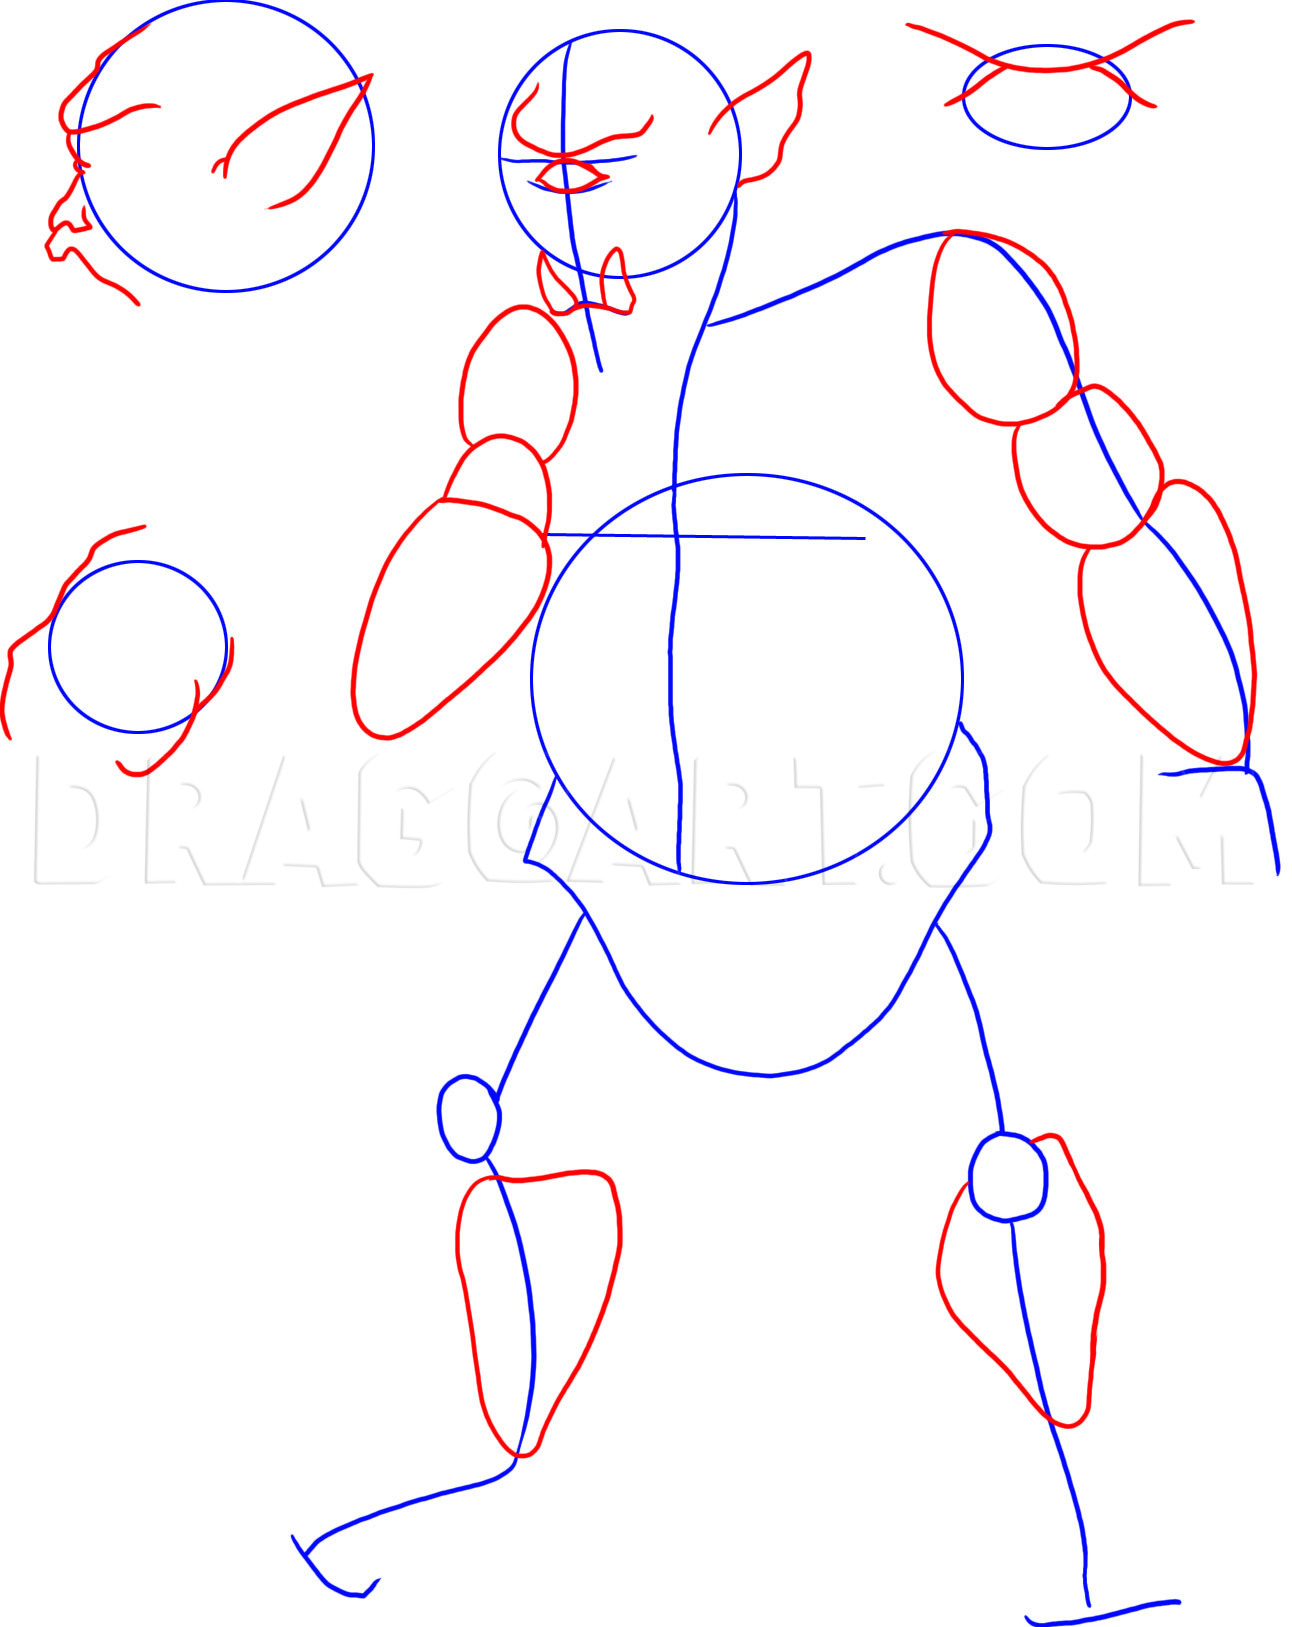
Okay, since there are three views of perspective, you will be doing more work than normal. What I want you to do first is draw four circles with one being for the head attached to his body. Draw out the facial guidelines and then draw the circle for
2
On the floating heads you will start drawing out the facial features like the ears, brow, nose and mouth. Do the same thing on the face of the full bodied Cyclops as well. When you draw the line for the Cyclops mouth you will also add two long teeth.

3
The floating figure on the right is a close up of the Cyclops eye, what I want you to do there is draw the scaly design that is his brow. Sketch out the shape of his head as well as the shoulder and arms. The head that is floating on the upper left h

4
238

5
Finish off the two floating parts of the Cyclops body (head and hand). You will start this step by sketching out the detailing for his loin cloth which is pretty simple to do. After that you can finish drawing out the arms and hands.

6
Draw out the shape of Cyclops legs and feet and add some muscle definition as well.

7
This is your last drawing step and all you have to do is first draw out the shape of his feet and then Cyclops toes. Erase all the guidelines and shapes that you drew in step one and proceed onto the next step.

8
This is what your finished drawing of Cyclops should look like when you are done. Color him in and you have completed this tutorial on "how to draw a Cyclops step by step".
Comments 0
Details
May 14, 2009
Description: Well I hope you guys liked the first lesson that I submitted on Wolverine from the new X-Men Origins movie. This next tutorial is going to be on a mythical creature from Greek Mythology. So, for my second lesson I will show you “how to draw a Cyclops step by step”. Little is known by me about this creature. All I know is that it is a very popular creature from Greek myths. A Cyclops is a giant that has one eye in the middle of his head and or face. A popular Cyclops character from one of my favorite movies was Rell the Cyclops from the 1983 movie “Krull”. He was big and strong and he was also the one that made it possible for their incredible fire horse ride that they took in order to reach The Beasts castle. The Cyclops creature has been written into movies and stories since the beginning of Greek mythology. It is thought that Cyclops is the son of Uranus and Gaia and this is according to the poem “Theogony” by Hesiod. Hesiod was a Greek poet that wrote about Greek mythology, farming and even astronomy. Now like the film “Krull” Cyclops was strong, very emotional, and often thick headed. Nowadays the word "Cyclops" is used to describe a one eyed person, creature, superhero, and even sculptured or hand drawn art. The word also holds the meaning of “one”. There is so many ways you can draw a Cyclops. You can make them look like the Cyclops creatures from your favorite video game, or even from one of your favorite movies. I chose to draw a typical looking Cyclops that is described from Greek mythology. I kept it real simple and only dressed him in a loin cloth. Some of you out there might want to cloth your creature with your own wardrobe. So let me go now because I still have four more tutorials to submit. Have fun learning “how to draw a Cyclops step by step”. I shall return my fellow DragoArt members and artists.


