How to Draw Yoda


1
First things first, most important, less skill level needed for this step. Draw a circle either by using a compass or freehand. Trace a circular object for a perfect or semi-perfect circle. Make sure you DRAW the guidelines that stroke criss-cross hi

2
This step is pretty crucial, only because the guidelines for this will definitely help you in the end. Draw a triangular shape for the base of his body with odd shapes for the hands. Don't forget to draw the line below that; averaging 2 inches long o

3
Let's finally work on the detail. I gray scaled the lines for a crisper view of the red. With your guidelines lightly drawn on your paper, let's define the face shape as well as the lids for the eyes. Take your time and strive to draw each of the det
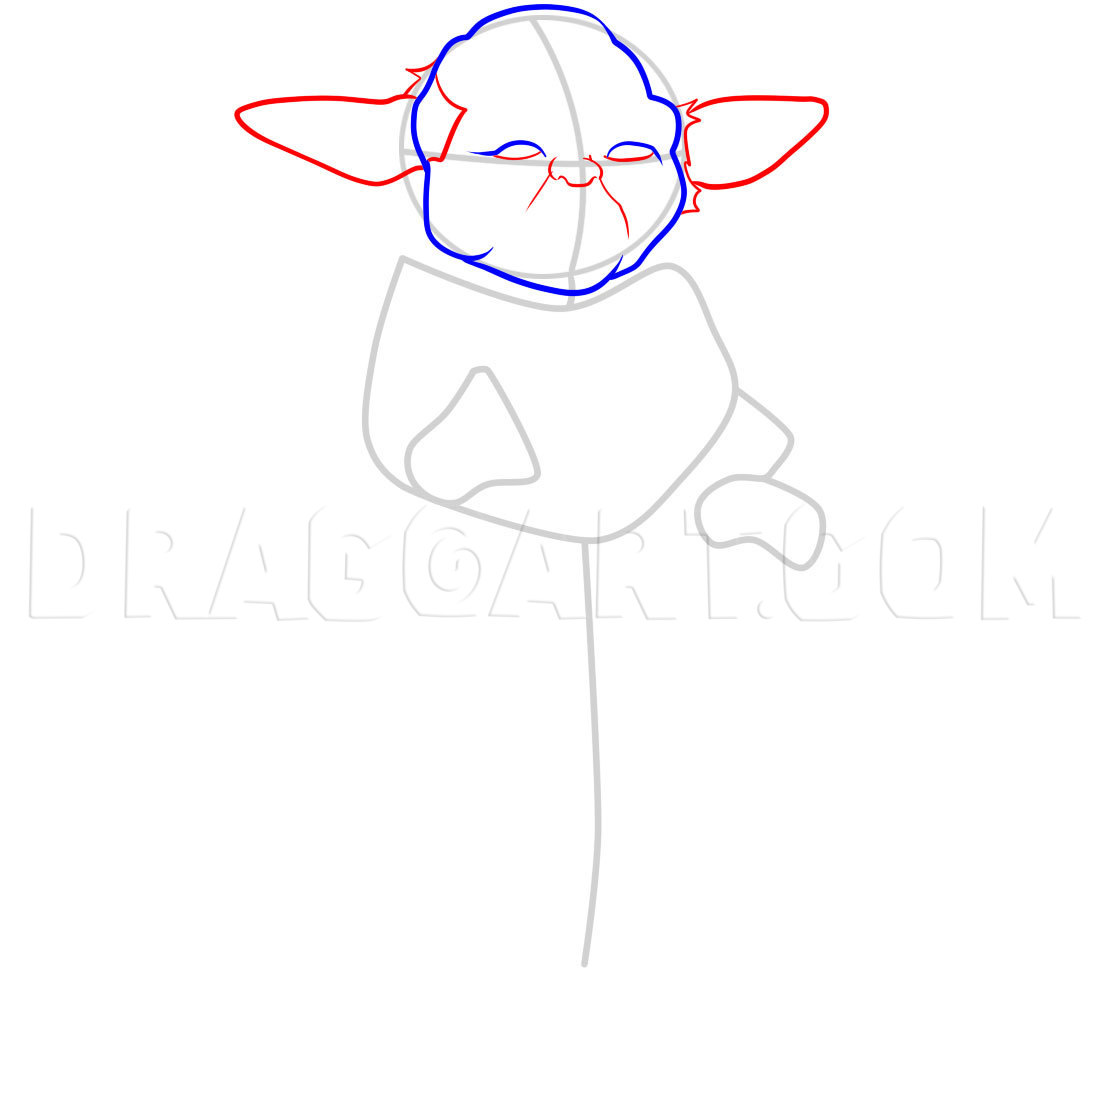
4
Next, draw the lower lids of his eyes, the small nose, and wrinkles that run by the sides of his nostrils. Take your time as this can be pretty tedious, even for small details. The ears should be drawn at an even length. Don't forget the hairline, wh

5
More definition is added in this step by sketching in wrinkle lines around the mouth some more and around the hair line near his ears. A few more wrinkles around the eyes won't hurt, and more detail to the ears would be a good thing to do as well. Us

6
Next, let's work on the neckline and the outskirts of the robe. By drawing this first, you'll have a better shot at the hands and cane (which was very hard for me to draw). The sleeves that droop at even lengths should be drawn at a 180 degree angle

7
This step will need some sweat and tears since we'll be drawing the hands and neckline. Try to draw the claws at an appropriate angle as well as the width that they're spreading. Remember to take your time and NEVER RUSH!

8
It's time to work on defining that misshapen cane and minor detailing to the sleeve to the left. Don't forget to draw the belt cinching his robe together as well as the necklace box.

9
Then, work on the inner details for the open hand to left and the robe that slopes downwards into the ground where his feet will be placed. Take your time and add the detailing for the wrinkles in the robe.

10
Next, draw the feet, making sure that each toe is spaced apart evenly as well as symmetrically. You don't need to add tons of definition to this part.

11
Lastly, add the detailing to his stick cane and the strange buttons on his necklace. Add the band that holds the necklace together and you're totally finished!

12
After you erase all the guidelines and sketch marks this is what you should end up with. You did an awesome job and all you have to do is color him. He looks good like this too, so if you wanted to keep him as a sketch you can do that as well.
Comments 0
Details
January 27, 2008
Description: Nobody really knows what type of creature Yoda is or where he comes from. The only thing I know is that he is an ancient Jedi Master, and he’s only about, I don’t know, 900 years old. This lesson is going to show you "how to draw Yoda, step by step", but first let's talk a bit about him shall we? The Star Wars saga in the years after Anakin Skywalker transformed into Darth Vader, Yoda was living out his years in a swamp when Luke came to be trained from old master Yoda. The force was very powerful with Yoda, he’s trained young Jedi for many centuries which included Obi-Wan-Kenobi and young Luke Skywalker. His powers and abilities were not only with the force, he also has incredible telekinesis ability. Remember when he ripped that column right from the ground and hummed it at Count Dooku, that was impressive for a little guy that didn’t even measure up to someone’s waist unless they were 5. Yoda was also seen as a clairvoyant; he could see parts of future events as well as feel all the good and bad around him. He was able to feel the pain and suffering from other Jedi’s when they were being killed in “Revenge of the Sith”. The only thing Yoda is equipped with besides his cane is a Lightsaber; he was known to be the greatest swordsman that ever lived. Some interesting facts you may not know about Yoda’s character is, when George Lucas created Yoda, he initially gave him a full name of “Yoda Minch”, but as time went by while forming the character, it was decided that he would leave his history unknown to entice the public. Have you ever wonder who exactly has the role of Yoda’s voice? I think I can answer that for you. In episode 4 it was Frank Oz who was the talent in the whole movie, then came John Lithgow for Empire Strikes Back, and Return of the Jedi. After all is said, Yoda is a strange mysterious character that all Jedi look up to and once in a while I hear friends recite his quotes once in a while. In this tutorial I will show you "how to draw Yoda" in detail. There are 7 steps and the instructions are laid out super easy. I have to go right now, but I’ll be back another day.


