How to Draw a Perched Dragon


1
Start the first step by drawing three shapes, the head, torso and body guides. When that is done add the lining for the wings and tail.

2
Use the head guide to sketch in the shape or structure for the dragon's head. As you can see this dragon has a more block style head and muzzle which is a nice change. The sharp frills or horns along the jaw line and face should be different in shape

3
We will fill in the mouth with small sharp little teeth, then sketch in the nostril, crinkle on the muzzle where the eyes are, and then sketch in the eyes. There should also be some fine definition too to add texture to the dragon's face.

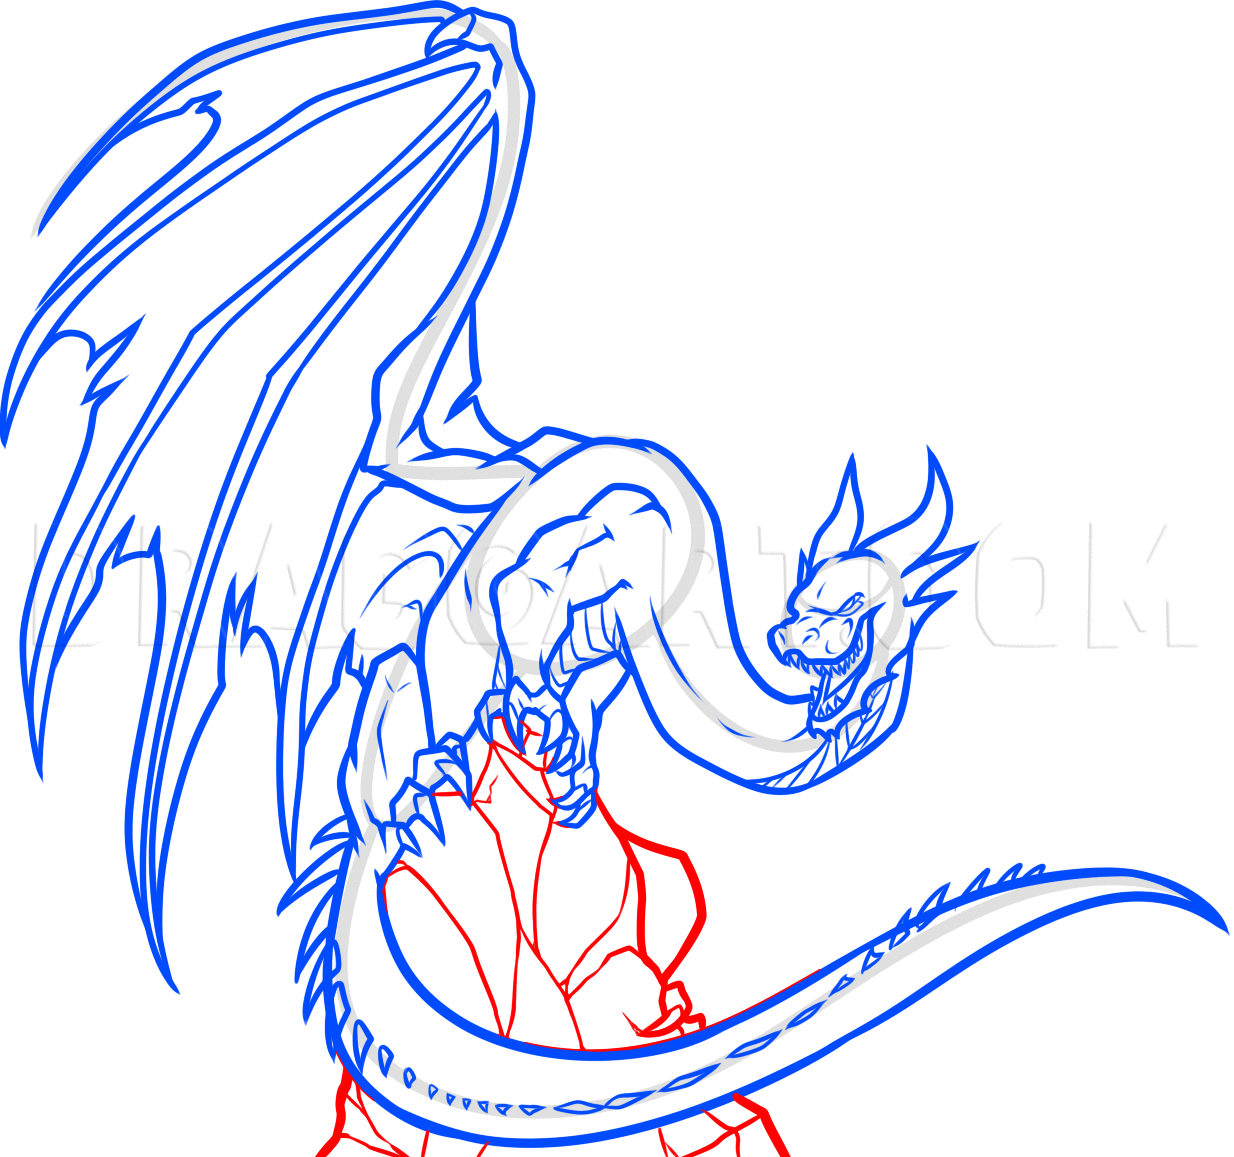
4
Here we can draw in the long slender neck as it curls in an arched pose. The back and shoulders or arms should be sketched in next. Make sure the arm is muscular.

5
Sketch in the talons or hands of the dragon as well as the other arm which is sort of hidden on the other side.

6
Next, sketch out the belly which has vertical scales, then draw in the detailing on the dragon's neck that also has the same style scales.

7
Sketch out the muscle detailing on the arm, then draw a small dash for the belly.

8
Dragons have wings attached to their backs while having a set of arms too, and there are also dragons that just have wings with no arms. This dragon has both arms and wings. Begin drawing the wings with a strong, limb like structure that is also musc

9
You will now draw in the skeletal fingers which will be the guides that the skin based wing tissue will attach to.

10
Sketch out the dragon's back, along with the hind leg, and clawed foot. The nails should be sharp and clutching the rock or hill when you draw that aspect of the image in.

11
Continue to work on the wing by completing its form. The skin should be torn between each finger of the wing like so, then sketch in detailing to the back part of the wing where it attaches to the dragon's back.

12
Before you draw the rock that the dragon is perched on, you will need to draw in the long, slender tail that will be wrapped around the rock.

13
Now add a flow of sharp spiny spikes down the dragon's tail like so. Notice how they all differ in size.
14
Here you will now sketch out the rugged rock that the dragon is perched on. The lining should be detailed to add texture to the rock. It should actually look more like a cliff.

15
Almost done people. Now all you have to do is sketch out the other wing. You don't have to really worry about detailing the skin because the skin is hidden from the wing facing the opposite direction.

16
Lastly, draw the spiny spikes on the dragon's neck and back like so, then start erasing the mistakes and guides.

17
Here is the line art now that you are done. You can color in your perched dragon any way you see fit.
Comments 0
Details
June 3, 2014
Description: I haven't made any dragon lessons in a while so this one will be a cool addition to the 'dragons' category. Today we will learn "how to draw a perched dragon", step by step. As many of you dragon lovers know these reptiles loved being perched on high ground so they can see all the action below them. Dragons were naturally a species that took what they wanted when they wanted it, and to do so they had to always be above ground so much higher then believed. They had amazing eye sight which enabled them to see the ground below and everything that lived under their feet. If you like drawing dragons, you will love drawing a perched dragon like you see here. Enjoy this lesson folks and be sure to leave some feedback to let me know what you thought of the lesson. Adios amigos!


